
If you need a craft that kids of all ages can do, try making this coffee filter butterfly!
We’re excited to partner with Crayola to create this coffee filter butterfly craft. I was compensated for this post but all opinions and experiences are my own.
The great thing about using coffee filters for crafting is that you probably have them around your house already! Plus, they can be used to make tons of different things, using the same techniques that we used to make our butterflies!
Coffee Filter Butterfly
When it comes to getting crafty with my kids, one of the things I try to find are crafts that both of them can make with me. The great thing about coffee filter butterflies with clothespins is that kids of all ages (adults included) can have fun making them together!
If you’re making a coffee filter butterfly with young kids, they will need a bit of help with some of the steps but can do a lot of this craft on their own. Older kids should be able to do it independently and I’ll admit that as a parent it’s fun to make one of your own too!

Coffee Filter Butterly Materials
- Coffee filters (2 per butterfly)
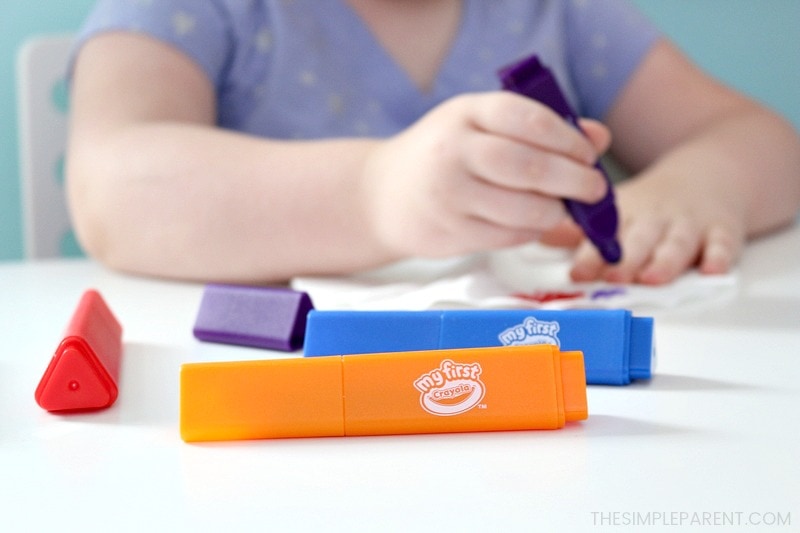
- My First Crayola Washable Tripod Grip Markers
- Spray bottle with water
- Clothespin (1 per butterfly)
- Pipe cleaners (1/2 per butterfly)
- My First Crayola Washable Paint Brush Pens
- Wax Paper

How to Make Clothespin Butterfly Craft
Place two coffee filters flat on top of each other on a surface that you don’t mind getting wet. Wax paper works well.
Use the markers to decorate the top coffee filter. The color will seep through to the second coffee filter too. Have your kids color most of the coffee filter with different colors, but they can leave some white parts as well.

Using a spray bottle filled with water and let your child mist the coffee filter with water. They should spray until the coffee filters are just dampened. If they get too wet, they could be too fragile.

Pull the two filters apart and lay them out to dry on a piece of wax paper. When they’re completely dry, you’ll have two beautiful filters to make the wings on your coffee filter butterfly!
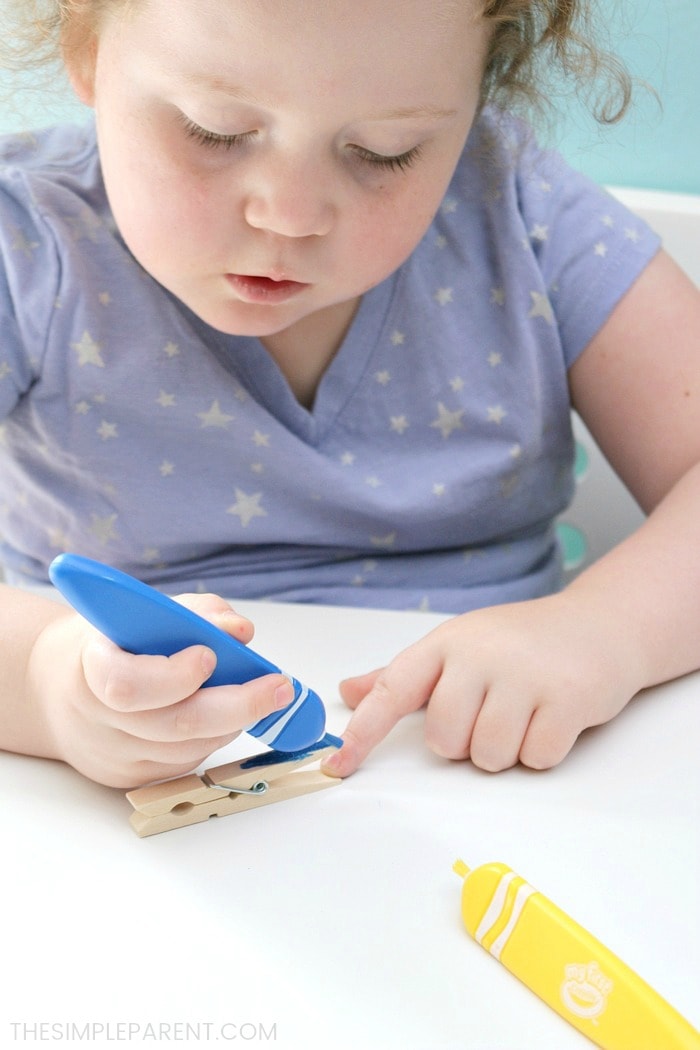
While the coffee filters are drying, paint the clothespins. Paint all four sides of each clothespin then set aside and allow to dry completely.
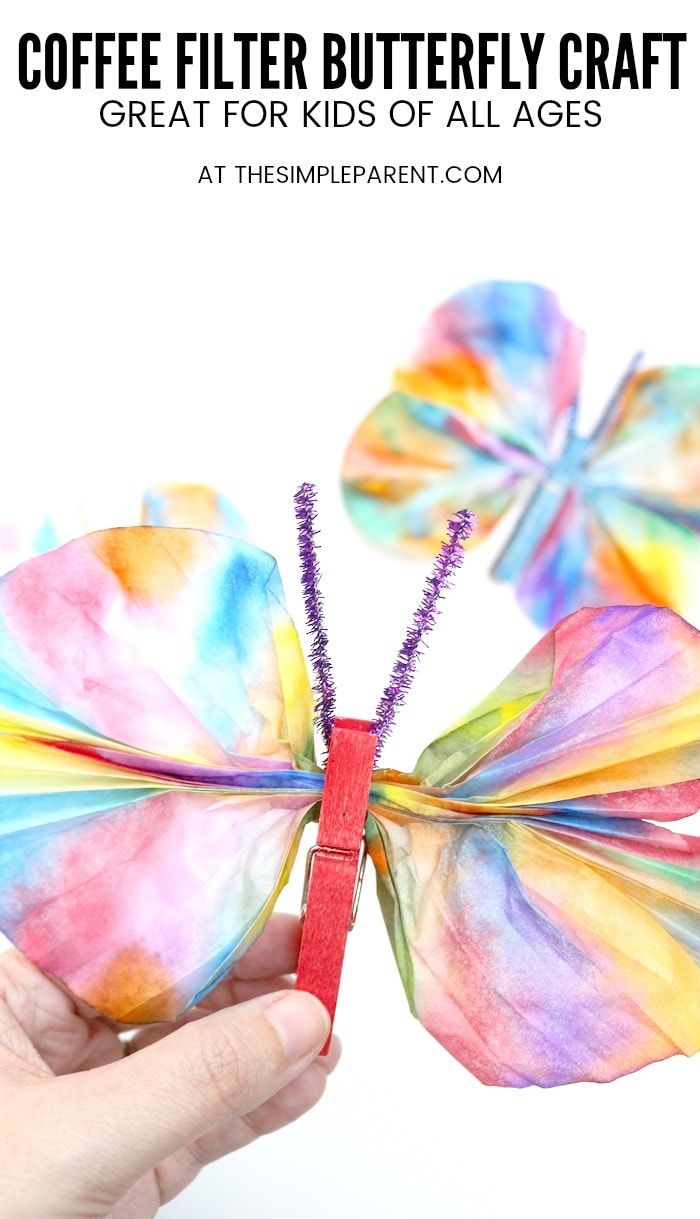
Once the coffee filters are dry, fold them back and forth like an accordion then pinch them in the middle to hold them together.

Clip the clothespin onto the center of the coffee filters where you were pinching them. Then gently spread the filters to create the four wings of the clothespin butterfly.

Use half of a pipe cleaner to create the antenna on the butterfly. Bend it in half and then you can bend it or curl it more to create unique butterflies.
Slip the pipe cleaner into the top of the clothespin to keep the antenna in place. Press the end of the clothespin together to make sure it holds on to the pipe cleaner.

That’s how easy it is to make this coffee filter butterfly craft! You can make a bunch of them pretty quickly and they’re gorgeous. They pair well with some of our favorite children’s books and I love that every butterfly looks different!
If you’re looking for another great butterfly and caterpillar related craft, try our C is for Caterpillar craft!

Coffee Filter Butterfly Craft
Ingredients
- 2 Coffee filters per butterfly
- My First Crayola Washable Tripod Grip Markers
- Spray bottle with water
- 1 Clothespin per butterfly
- 1.2 Pipe cleaners per butterfly
- My First Crayola Washable Paint Brush Pens
- Wax Paper
Instructions
- Place two coffee filters flat on top of each other on a piece of wax paper.
- Use the markers to decorate the top coffee filter.
- Using a spray bottle filled with water and mist the coffee filter with water until it is damp but not soaked.
- Pull the two filters apart and lay them out to dry on wax paper.
- Paint all four sides of each clothespin then set aside and allow to dry completely.
- Once the coffee filters are dry, fold them back and forth like an accordion then pinch them in the middle to hold them together.
- Clip the clothespin onto the center of the coffee filters.
- Gently spread the filters to create the four wings of the clothespin butterfly.
This project was made even easier with help from My First Crayola products! Creativity doesn’t have to wait until kids are old enough to do arts and crafts on their own.
No matter how old they are, toddlers have the potential to get involved in art. When I was teaching preschool, some of our best lessons had art projects that went with them. The kids loved having the chance to get creative. The My First Crayola products are perfect for the early stages of creative development in our children.
By giving our kids tools that match their readiness, we can encourage them to use their imaginations and develop critical thinking skills.
The My First Crayola products are available in three stages so that our kids have the right tools for their level of development.
- Stage 1: Scribble – This stage is for the little ones who are starting to make their first marks on the world! (12 months and up)
- Stage 2: Doodle – These products are for children who are beginning to show more control over their drawings with doodle shapes like circles, swirls and wavy lines. (24 months and up)
- Stage 3: Draw – This level offers products for toddlers who are moving from the early doodles to rough, purposeful drawings that we can often recognize! (36 months and up)
Carrigan is now on the older end of the age range for the My First Crayola products but I find that we still use all of the products! They’re the art supplies that she feels comfortable and confident using!
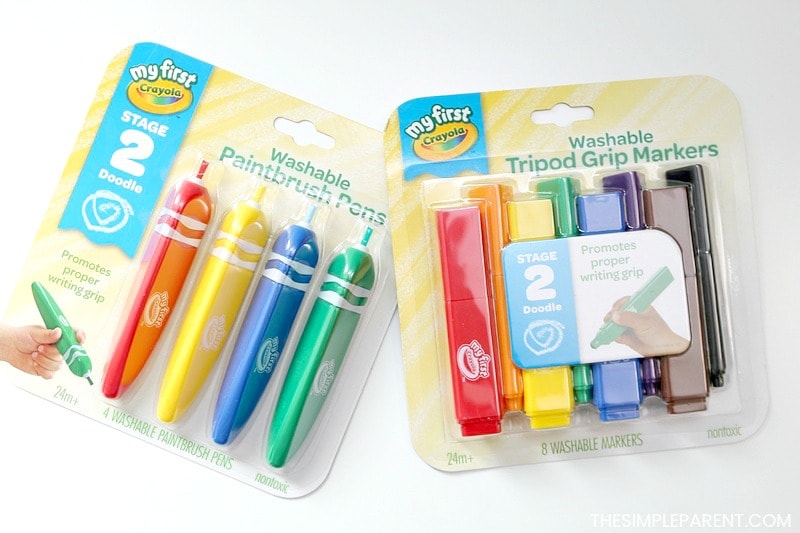
My First Crayola Washable Tripod Grip Markers and My First Crayola Washable Paint Brush Pens were perfect for making our butterflies. They’re both Stage 2: Doodle products that are designed for children 24 months and older.
As a former teacher and a mom, I like that the tripod shape promotes proper writing grip while being easy for kids to hold. Another great thing about them is that they don’t roll off the table while we’re crafting!

Like so many of our favorite Crayola products, the My First Crayola products are washable! That makes clean up easy even when Carrigan accidentally gets paint all over the wall behind her! I just needed a damp cloth and the wall was clean again!
You can learn more about all of the My First Crayola products to find out which would be best for your child’s developmental age. It’s never too early to start making art!

Kiara says
I love how pretty these are!
Wendy Livingstone says
FYI – Grok gave me your beautiful coffee filter butterfly!
Thank you – this is perfect!
I am teaching K – 1 at our Homeschool Co-op!
God bless you,
Wendy xoxo