When it comes to Christmas, I love letting the kids help decorate the house with things they have made. It just adds a special something that is part of being a mom. These tissue paper ornaments are a fun craft that are also perfect for decorating the windows and doors with windows because they double as suncatchers!
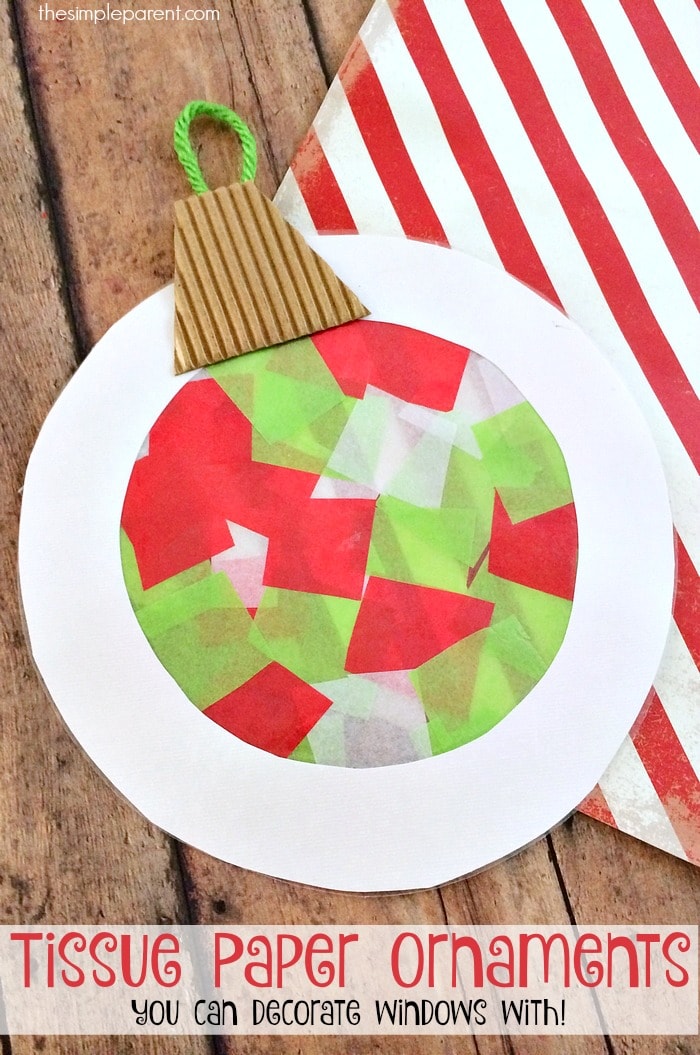
Tissue Paper Ornaments
To make these tissue paper ornaments, we used some of the basic craft supplies we always seem to have laying around. So it can be a great way to use up those scraps of tissue paper and scrapbook paper you might have!
I’ve included our affiliate links for a few materials in case you need to order anything!
What You Need:
- White piece of scrapbook paper or card stock
- Tissue paper pieces cut into small squares
- A small paper plate
- Brown wavy scrapbook paper
- Green yarn
- Clear contact paper
- Scissors
- Hot glue/hot glue gun
What You Do:
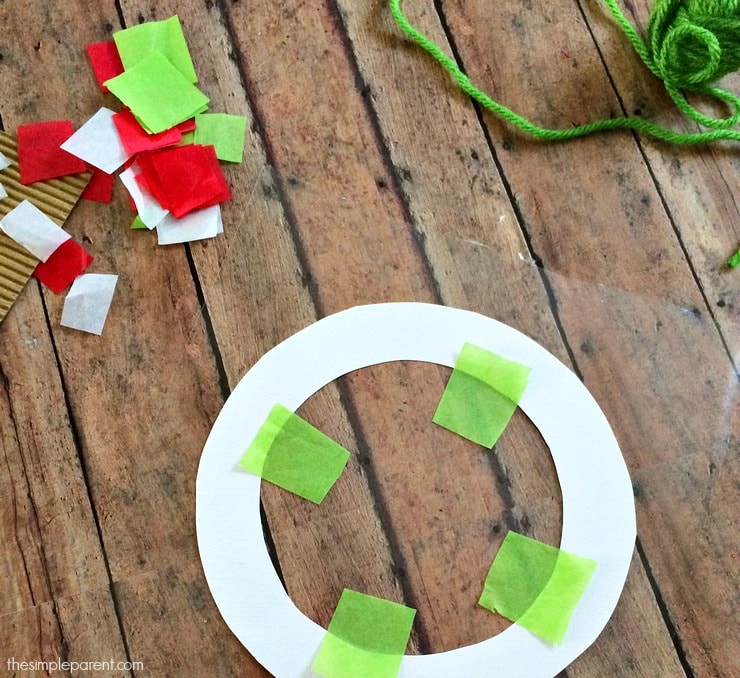
- Trace the paper plate onto the white scrapbook paper and cut out.
- Cut the inner circle out of the plate and trace onto the white scrapbook paper circle.
- Cut out the inner circle so that the circle becomes a hoop shape.
- Cut a small square out of the clear contact paper and place the white hoop on top.
- Begin placing the tissue paper squares on the inside of the hoop.
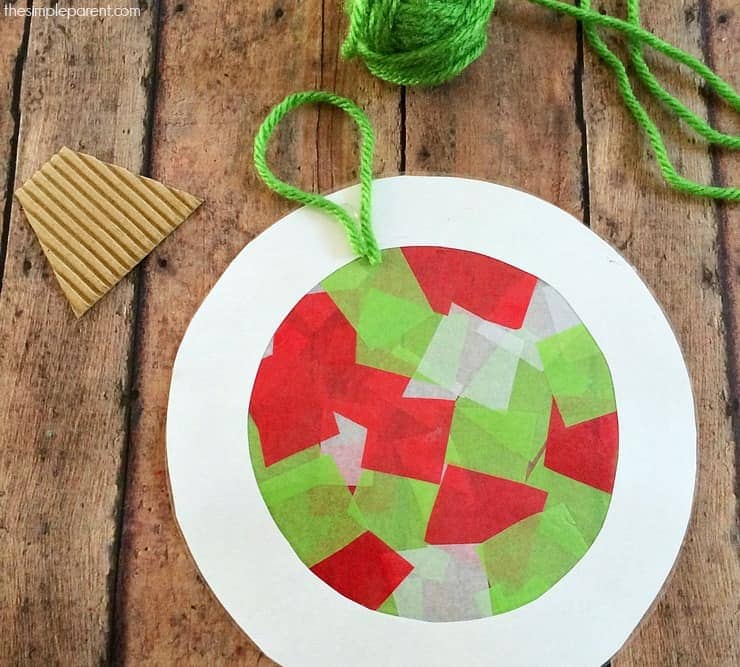
- Once the hoop is filled, cut another small square out of the clear contact paper, and place on top of the “ornament.”
- Trim the contact paper off along the outside of the ornament.
- (Parent step) Using a hot glue gun, glue a 3″ piece of yarn together making a loop, the glue the loop onto onto the ornament.
- Cut a small triangle out of the wavy paper, then cut the tip off, and glue this piece over the yarn loop.
Hang up on your window for a stained glass look! We love how these tissue paper ornaments look hanging in our windows and on the back door! It’s a fun way to add a homemade festive touch to your holiday decorations!

Rea says
What a delightful idea! I love how these tissue paper ornaments can brighten up any room while being so easy for kids to make. Can’t wait to try this with my little ones during our next crafting session! Thanks for sharing such a fun activity!