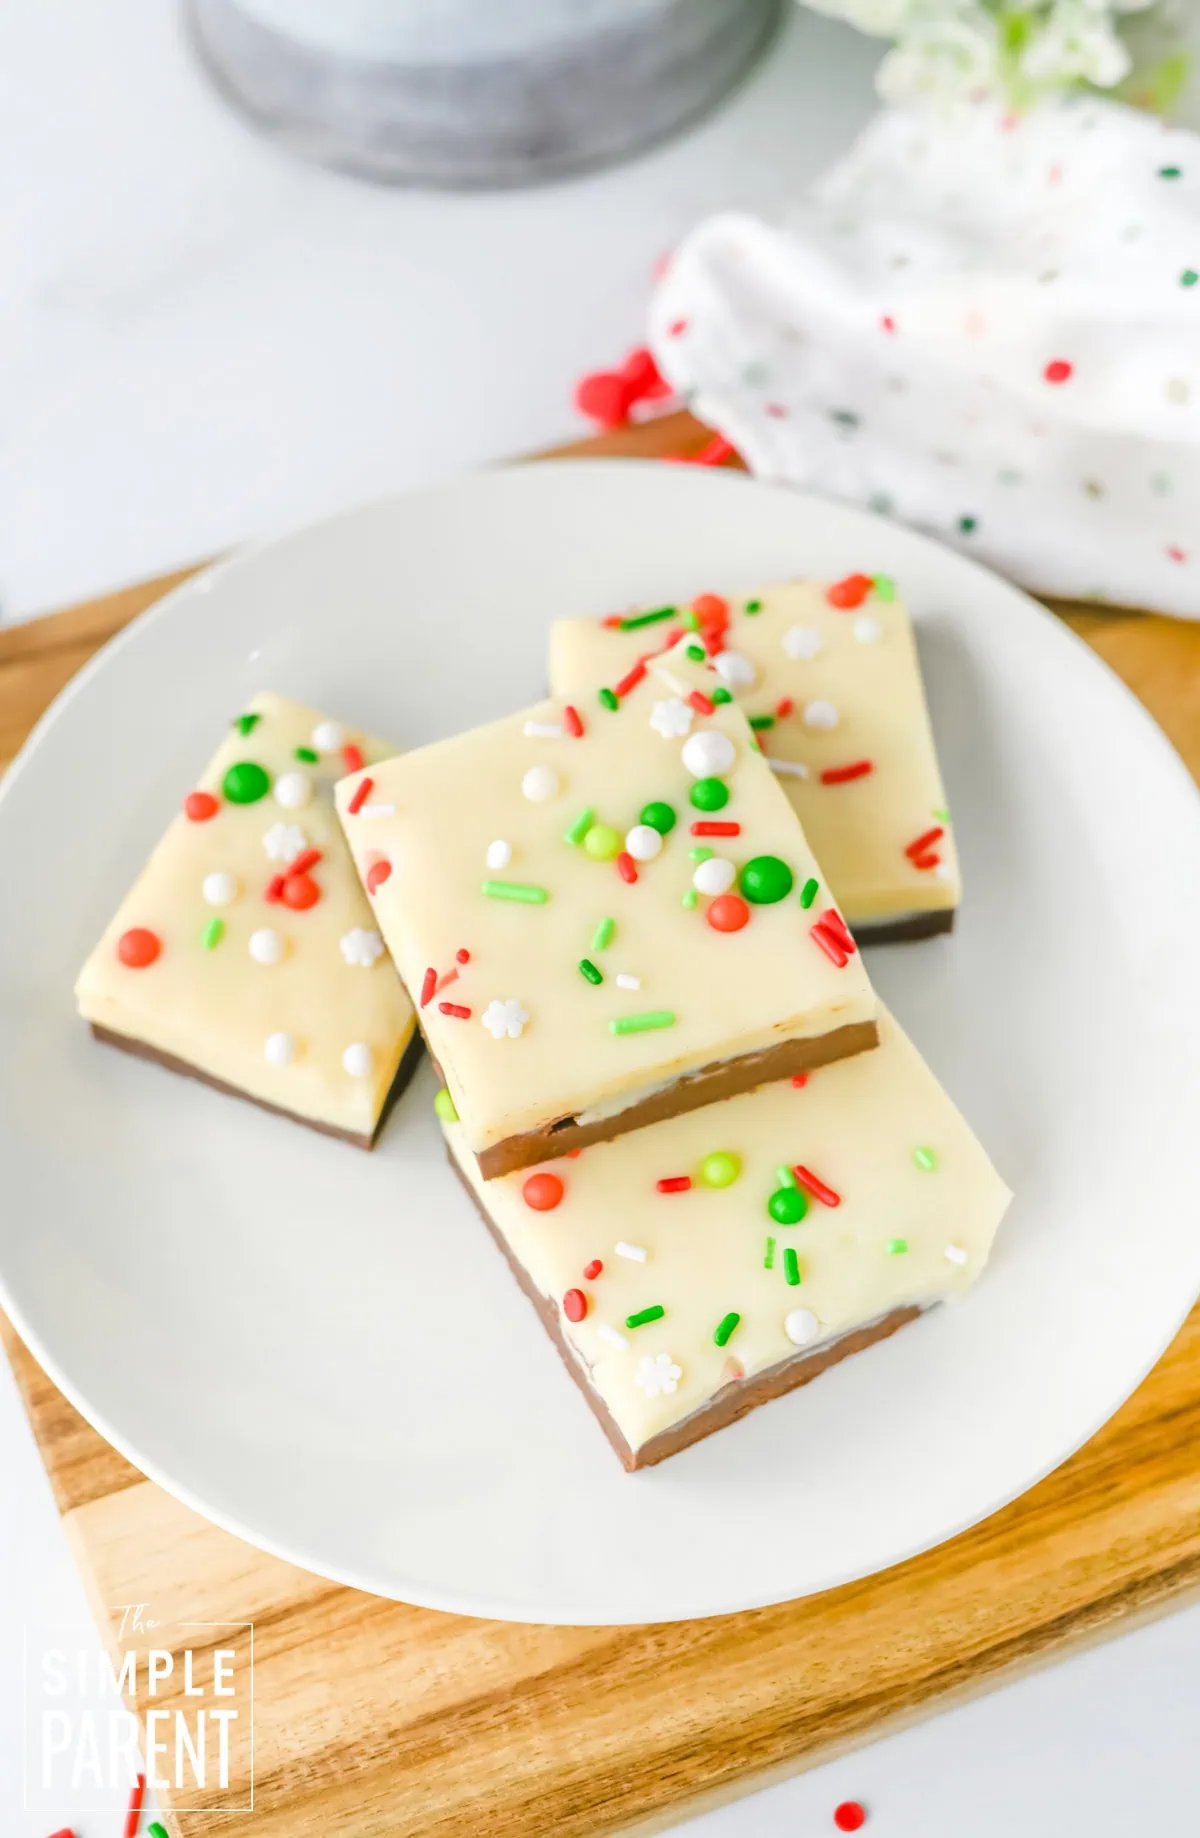
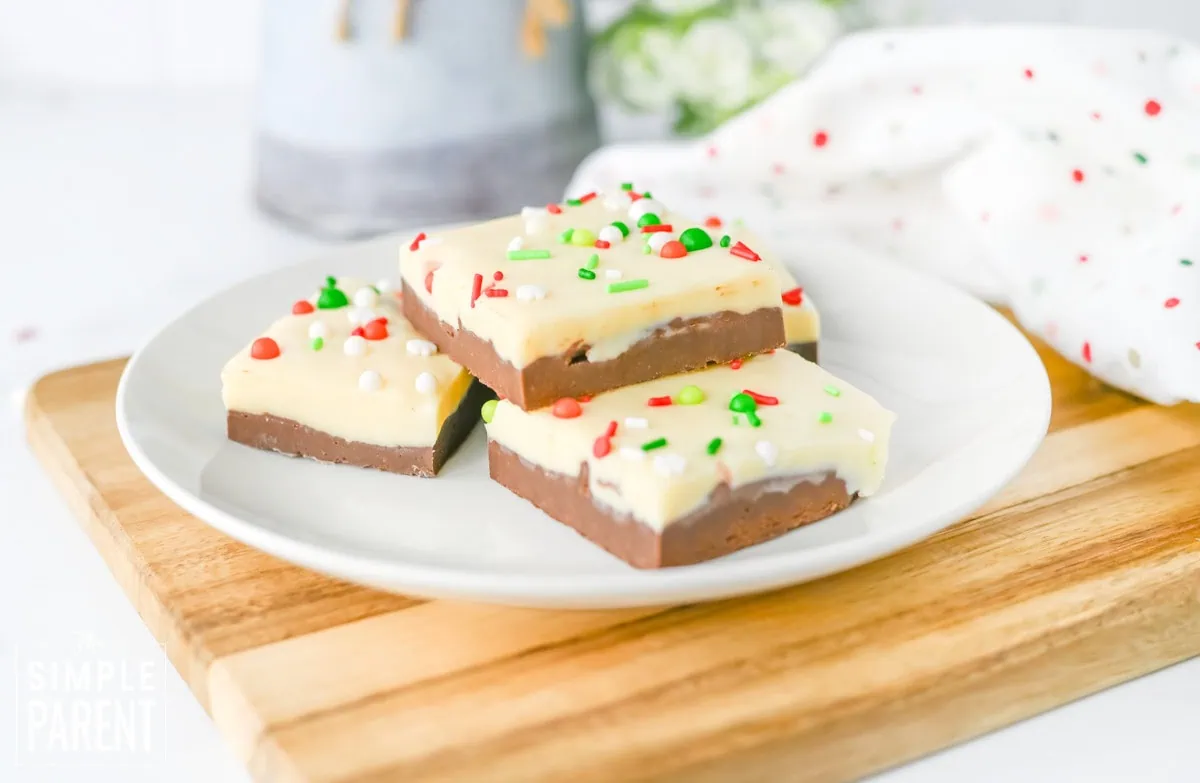
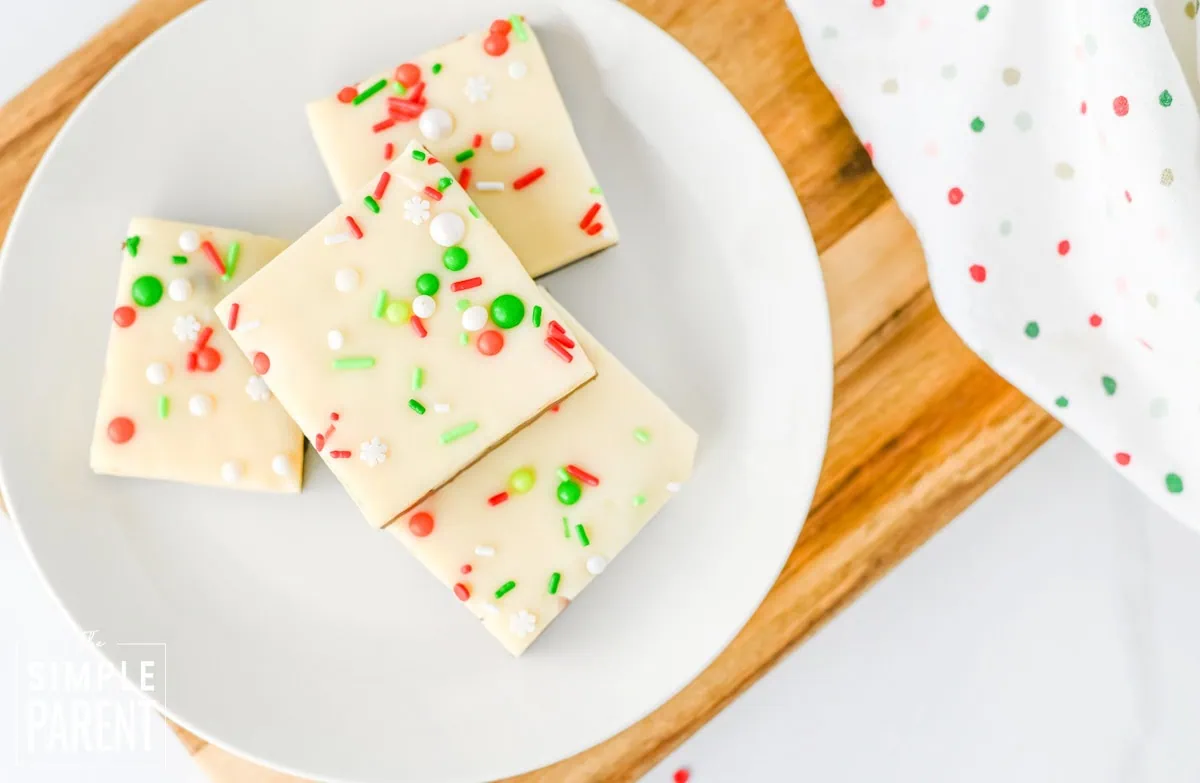
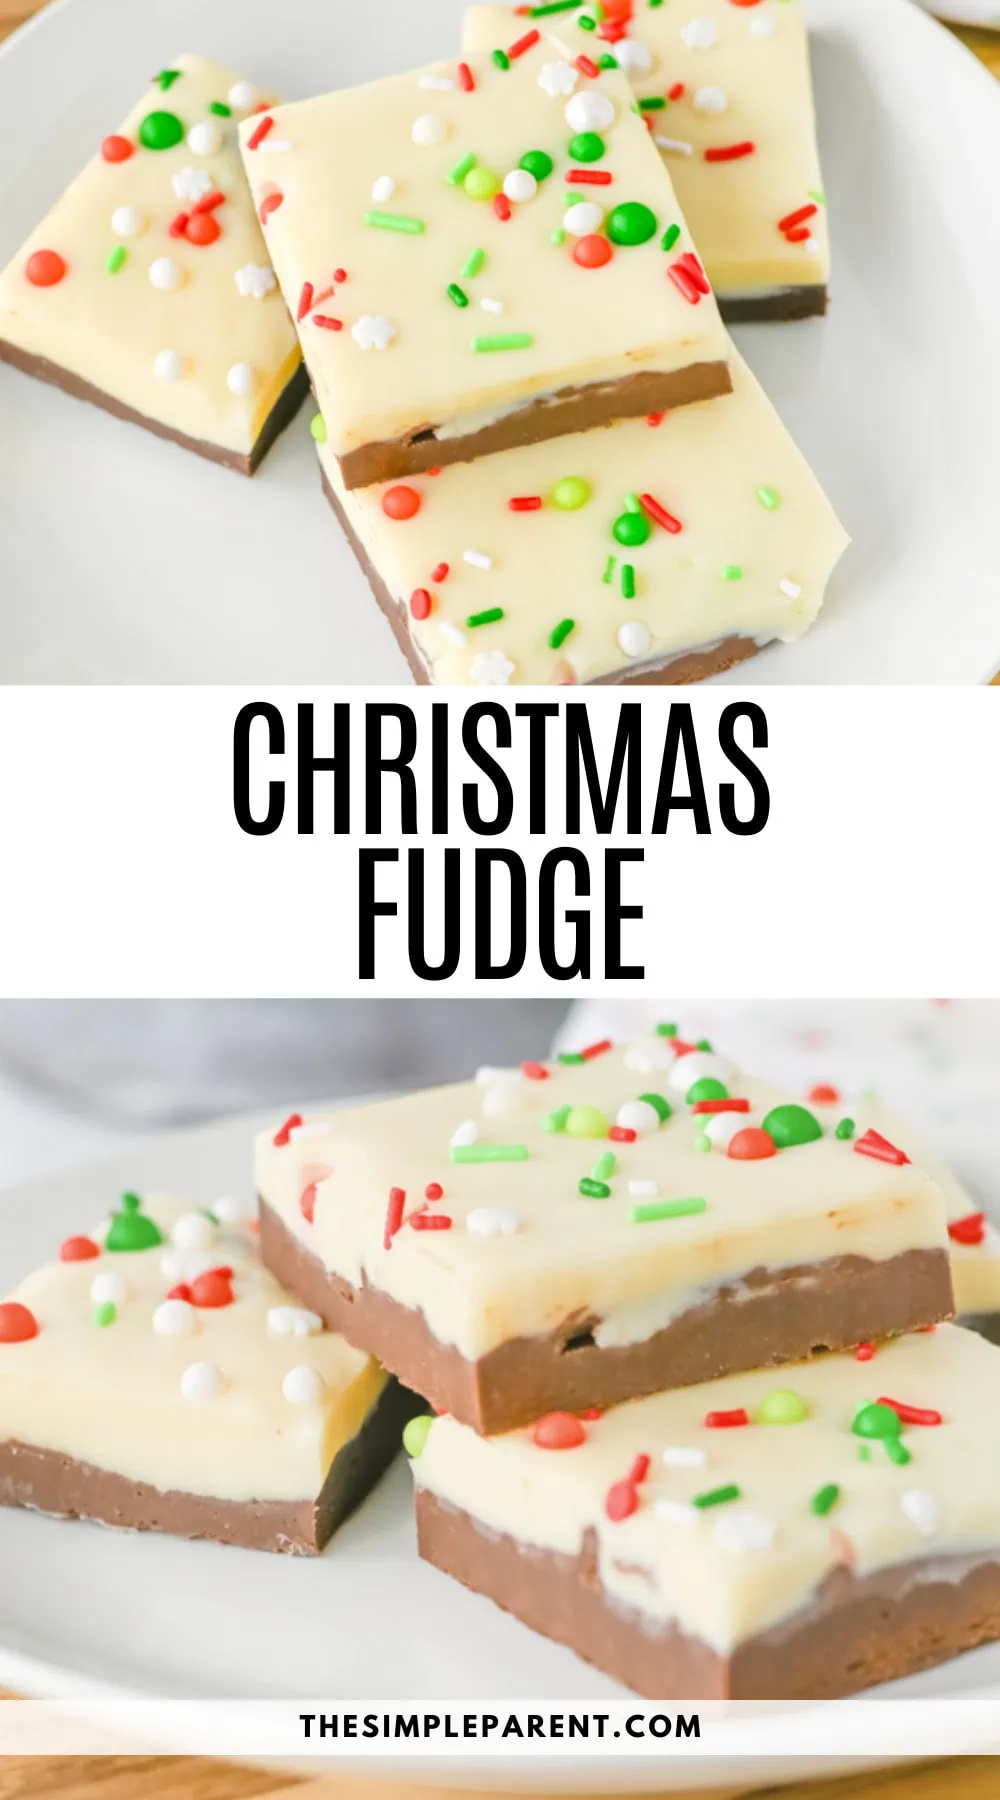
Christmas Fudge is a festive two-layer treat that combines rich chocolate and creamy white chocolate topped with colorful holiday sprinkles. This microwave fudge takes just 20 minutes of hands-on time and creates beautiful layered squares that look impressive on any holiday dessert table.
Christmas Fudge
What makes this recipe so perfect for the holidays is how easy it is to make both layers in the microwave with no candy thermometer needed. The chocolate and white chocolate layers look gorgeous together, and the Christmas sprinkles on top make every piece feel extra festive. It’s perfect for cookie swaps, holiday parties, or packaging up as homemade gifts.
Ingredients & Equipment
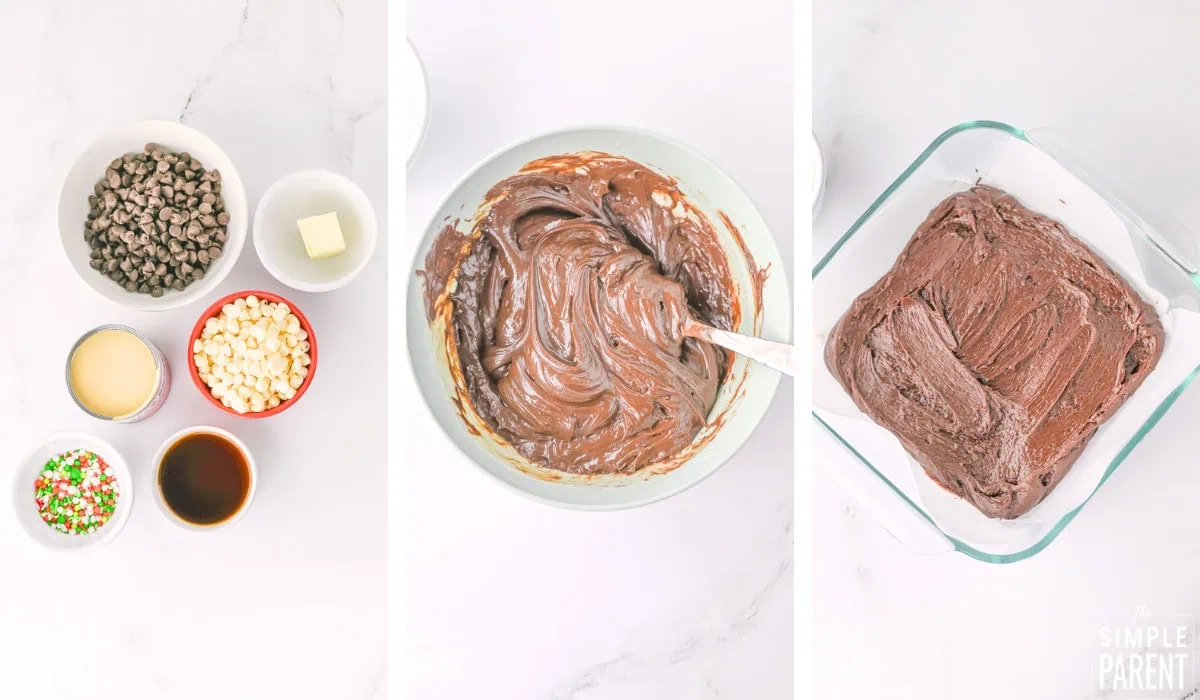
- Sweetened condensed milk
- Unsalted butter
- Vanilla extract
- Semi-sweet chocolate chips
- White chocolate chips
- Christmas sprinkles
Full measurements for each ingredient can be found in the printable recipe card at the bottom of this post.
You’ll also need a few things from your kitchen:
- 8×8 or 9×9-inch square baking dish
- Parchment paper
- 2 microwave safe bowls
- Spoon or spatula for stirring
- Sharp knife for cutting
Step By Step Directions
This recipe makes 9 servings. It takes 20 minutes of prep time.
Step 1. Line an 8×8 or 9×9 square baking dish with parchment.
Step 2. Add the semi-sweet chocolate chips, half of the sweetened condensed milk, and 1 tbsp butter to a microwave safe bowl.
Step 3. Microwave for 30 seconds, and stir well. If not melted, microwave for 15 seconds more and stir to combine. Once melted, stir in 1 tsp vanilla extract.
Step 4. Spread the chocolate fudge mixture evenly into the bottom of your baking dish.
Step 5. Refrigerate this for 30 minutes.
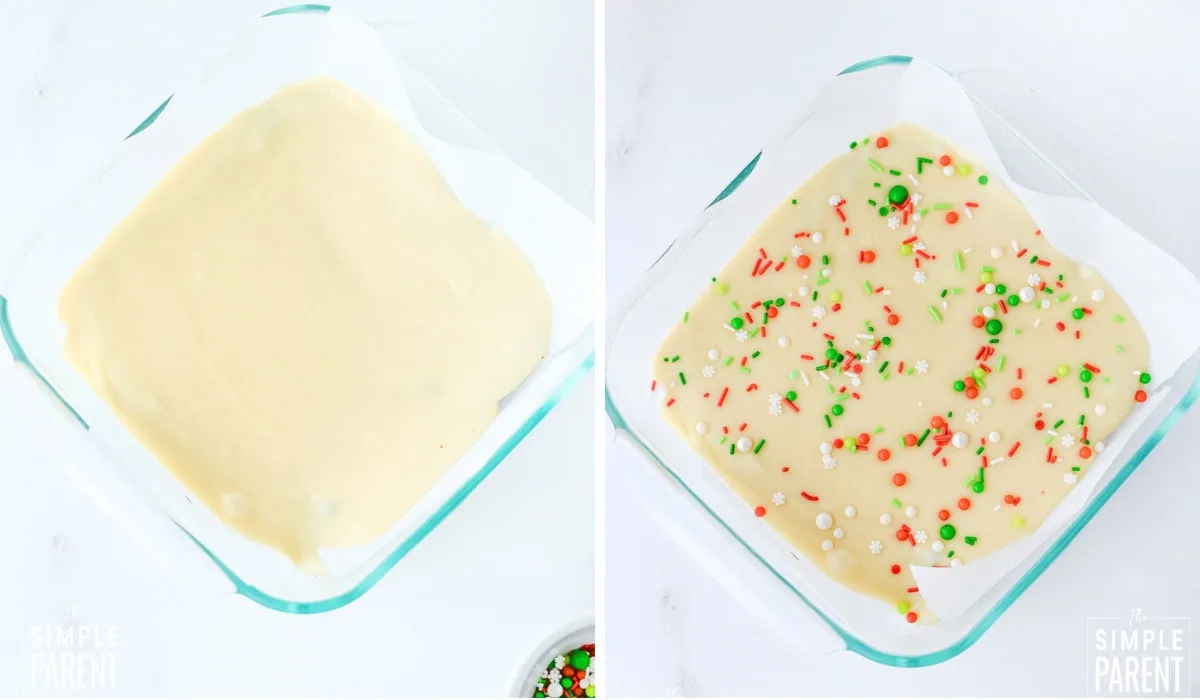
Step 6. Then, add the white chocolate chips, remaining half of the sweetened condensed milk, and 1 tbsp butter to a microwave safe bowl. Repeat the process, microwave for 30 seconds, stir well, and microwave 15 seconds more if needed. Stir well to combine and stir in 1 tsp vanilla.
Step 7. Layer the white chocolate fudge over the regular chocolate fudge.
Step 8. Sprinkle the Christmas sprinkles over top.
Step 9. Move the fudge to the refrigerator for at least 4 hours, or overnight.
Step 10. Cut into squares and enjoy.

Variations
- Use dark chocolate chips instead of semi-sweet for a richer, more intense chocolate layer
- Add crushed candy canes or peppermint extract to the white chocolate layer for peppermint fudge
- Try red and green sprinkles for more traditional Christmas colors
- Make three layers by dividing the recipe into thirds and adding a middle layer of your choice
- Mix chopped nuts into either layer before spreading in the pan
- Use Valentine’s Day sprinkles for a pink and red version perfect for February
- Swap the sprinkles for crushed Oreos or graham crackers for a different texture
Leftovers & Storage
Store Christmas Fudge in an airtight container in the refrigerator for up to two weeks. Keep layers separated with parchment paper to prevent sticking. You can also freeze it for up to three months, making it perfect for making ahead before the holiday rush.
Tips & Tricks
- Use microwave-safe bowls that are large enough to prevent overflow when the mixture bubbles
- Stir thoroughly after each microwave interval to ensure everything melts evenly
- Let the first chocolate layer set for the full 30 minutes so the white chocolate layer doesn’t sink into it
- Spread each layer gently and evenly for the cleanest looking two-tone effect
- Add the sprinkles right after pouring the white chocolate layer so they stick better
- Let the fudge come to room temperature for about 10 minutes before cutting for cleaner slices
Recipe FAQs
Can I make this on the stovetop instead of the microwave? Yes! Melt each layer in a small saucepan over low heat, stirring constantly until smooth. The timing and process are the same, just watch carefully to prevent burning.
Why is my fudge grainy instead of smooth? Grainy fudge usually happens when the chocolate gets too hot in the microwave. Use shorter intervals (15 seconds) and stir well between each one. White chocolate is especially prone to seizing if overheated.
Can I skip the first 30-minute chill time? I wouldn’t recommend it. If you pour the white chocolate layer over chocolate that’s still soft, the layers will blend together instead of staying distinct. The 30-minute wait is worth it for clean layers.
How do I cut clean layers without the chocolate cracking? Let the fudge sit at room temperature for 10 minutes before cutting, use a sharp knife, and run it under hot water between cuts. Wipe the knife dry before each new cut.
Can I use milk chocolate chips instead of semi-sweet? Absolutely! Milk chocolate will make the bottom layer sweeter and a bit lighter in color. It’s a great option if you prefer less intense chocolate flavor.
What if I don’t have Christmas sprinkles? You can use any festive topping you have – crushed candy canes, chopped nuts, mini chocolate chips, or even leave it plain. The fudge tastes great either way!
More Fudge Recipes
- Fantasy Fudge
- Peppermint Fudge
- Sugar Cookie Fudge
- Chocolate Caramel Fudge
- Easy Chocolate Fudge
- White Chocolate Fudge
- Maple Fudge
- Christmas Peanut Butter Fudge
- Chocolate Frosting Fudge
Ingredients
- 14 oz sweetened condensed milk divided
- 2 tbsp unsalted butter divided
- 2 tsp vanilla extract divided
- 1 cup semi-sweet chocolate chips
- 1 cup white chocolate chips
- 2 tbsp Christmas sprinkles
Instructions
- Line an 8x8 or 9x9 square baking dish with parchment.
- Add the semi-sweet chocolate chips, half of the sweetened condensed milk, and 1 tbsp butter to a microwave safe bowl.
- Microwave for 30 seconds, and stir well. If not melted, microwave for 15 seconds more and stir to combine. Once melted, stir in 1 tsp vanilla extract.
- Spread the chocolate fudge mixture evenly into the bottom of your baking dish.
- Refrigerate this for 30 minutes.
- Then, add the white chocolate chips, remaining half of the sweetened condensed milk, and 1 tbsp butter to a microwave safe bowl. Repeat the process, microwave for 30 seconds, stir well, and microwave 15 seconds more if needed. Stir well to combine and stir in 1 tsp vanilla.
- Layer the white chocolate fudge over the regular chocolate fudge.
- Sprinkle the Christmas sprinkles over top.
- Move the fudge to the refrigerator for at least 4 hours, or overnight.
- Cut into squares and enjoy.
Notes
Pin This Post
Leave a Reply