If you’re a family who likes to take road trips or just spends a lot of time in the car traveling from one activity to the next, putting together a kids survival kit for the car is something I recommend doing. You can buy a first aid kit and other survival kits, but for busy moms, finding car survival kits that encompass everything from safety to snacks to entertainment is pretty much impossible.
Learn how to make your own DIY kids car kit that you can customize to meet the needs of your family! You can even make a road trip survival kit for traveling with pets too!
This post is sponsored by Cricut.
DIY KIDS CAR SURVIVAL KIT
Survival in the car can mean a lot of different things. For parents, it’s often about keeping the kids happy while they’re in the car. You can purchase an emergency kit for kids that covers basic first aid and even bigger emergencies, but this DIY project will help you make a kids car kit to cover all of the little things that can make or break you on the road.
When kids are younger, we tend to carry bigger bags full of all of the things they might need when not at home. A diaper bag, toddler emergency kit (especially when potty training), and things like that had me feeling prepared when the kids were younger.
Now that my kids are older, we don’t take quite as big of a bag unless we’re headed to the baseball field for a few hours. These are the times when having a car survival kit is key. If you happen to be headed to the park or the beach and realize you forgot the sunscreen? Your car kit will have you covered!
Run out of snacks? Stashing some in the kids car kit will mean you always have something in an emergency. No one likes a hangry kid when driving in the car.
Follow these easy steps using your Cricut Joy or Cricut Explore to personalize your own DIY car kit for your family!

DIY KIDS CAR KIT
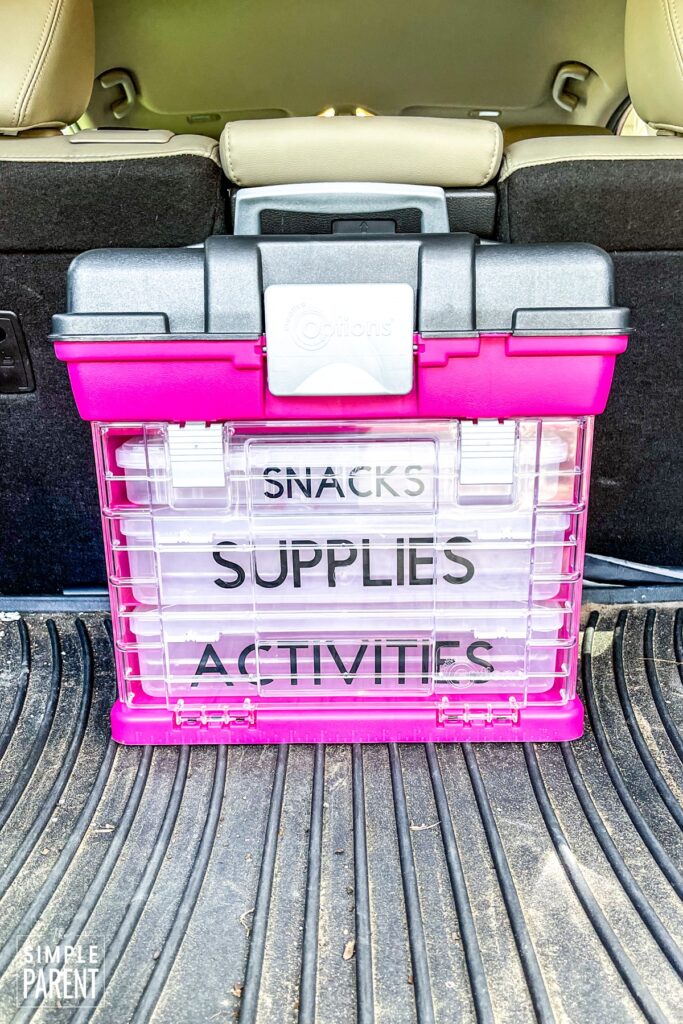
The most important step of planning a survival kit for your kids is to find an organizer that works well. I was looking for a large organizer with multiple trays that could be used for different items. I was inspired by the friends I have seen use small tackle boxes and craft organizing boxes as snack boxes for their kids when they’re traveling.
You might find a toolbox-type organizer, fishing tackle box, or craft organizer. I wanted a large organizer so I went looking at craft organizers and found the Creative Options Large Grab & Go Rack System. It works great for craft supplies so I thought it might work well in the car.
It also comes in smaller Medium and Small sizes as well. The Stalwart Durable organizer is another similar option.

Once you find a container that will work in your car, you can start deciding what goes into each drawer and compartment.
Some of the things to think about including in your road trip survival kit include:
- Snacks (that work for warm weather if leaving them in the car)
- fruit snacks
- dried fruit
- fruit leather
- beef jerky
- nuts
- granola bars
- crackers
- cookies
- gum/mints
- Drinks
- small water bottles can fit in larger organizers
- drink mix packets
- small juice boxes
- First Aid Supplies (or First Aid Kit) & Medications
- bandages of different sizes
- alcohol wipes
- antibiotic cream
- itch cream
- moleskin
- tweezers
- nail clippers
- motion sickness medication
- pain relievers
- allergy meds
- cold meds
- earplugs
- instant cold packs
- eye drops
- Backup Activities
- small toys
- art supplies
- stickers
- sticky note pads
- dry erase markers (can be used with small dry erase boards or on windows)
- books
- deck of cards
- small fidget toys
- Basic Supplies
- wet wipes/baby wipes
- tissues/paper towels/toilet paper
- hand sanitizer
- hand lotion
- plastic bags or small trash bags
- extra charging cords
- battery packs
- earbuds or headphones
- sunscreen
- bug spray
- lip balm
- deodorant
The best part about making your own kit for the car is that you can include anything that works well for your family. You can also change things out as your needs change.

PERSONALIZING CAR SURVIVAL KIT
Once you decide on the items you’ll include and find a container that works well for your family’s needs, you can use your Cricut machine to customize and personalize your car kit.
By adding labels to different parts of the organizer, you’ll know which tray to pull out when you need an item from your car kit!
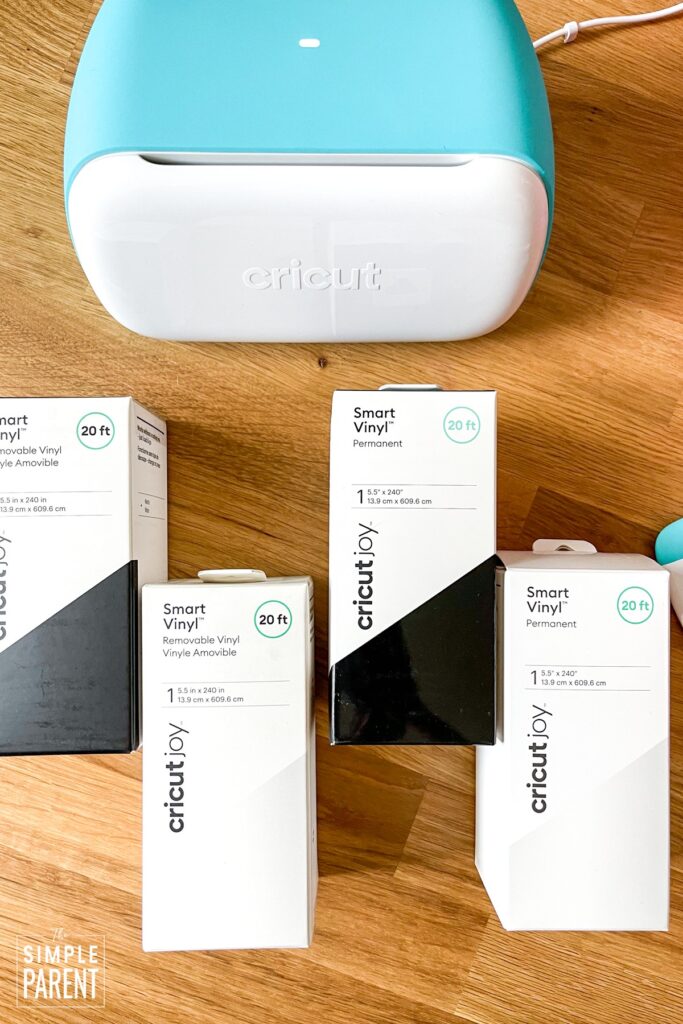
For this project, I used my Cricut Joy™ and Black Cricut Joy Smart Vinyl. You can do the same thing with the Cricut Explore machine. When I’m only cutting letters and words, I tend to break out my Cricut Joy because it’s smaller. With Smart Materials, it’s easy to do quick labeling projects. I’ve used it to make custom baseball flags, label water bottles, add labels to end-of-season sports gifts, and label supply boxes for my journaling supplies!
I’ve also used my Cricut Joy to create a Family Command Center, back to school ideas, and customized furniture!
The Joy can draw any shape and can write in a variety of different styles. You can also use it with over 50 different materials including Smart Materials. Cricut Smart Materials make it easy to make cuts because you don’t need a cutting mat. These are my favorite materials to use with my Cricut Joy.
The Cricut Joy cuts individual shapes up to 4 ft long or makes repeated cuts up to 20 ft long with Smart Materials.
Shop the Project
For this project, I used these materials:
- Cricut Joy
- Black Cricut Joy™ Smart Vinyl™ – Permanent
- Cricut Transfer Tape
- Cricut Weeder Tool
- Cricut Scraper
For this project, I used Cricut Design Space to create the words needed for each part of the car organizer.

Another trick for this specific organizer is that I turned the trays around to give me a better surface to put my vinyl on. The trays fit in the main organizer compartment in either direction so it works well.
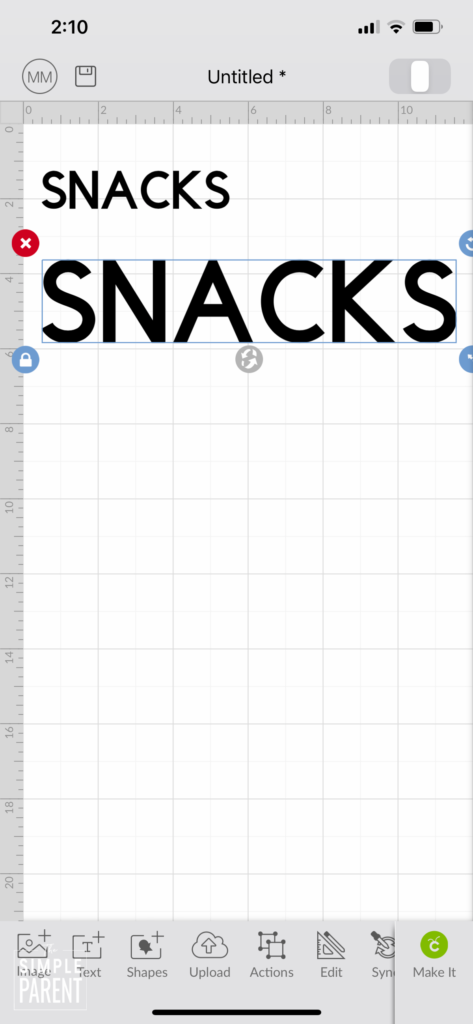
Once you have planned out all of your text for labels, Design Space takes you through each step, including loading the material, making the cuts, and unloading the material.

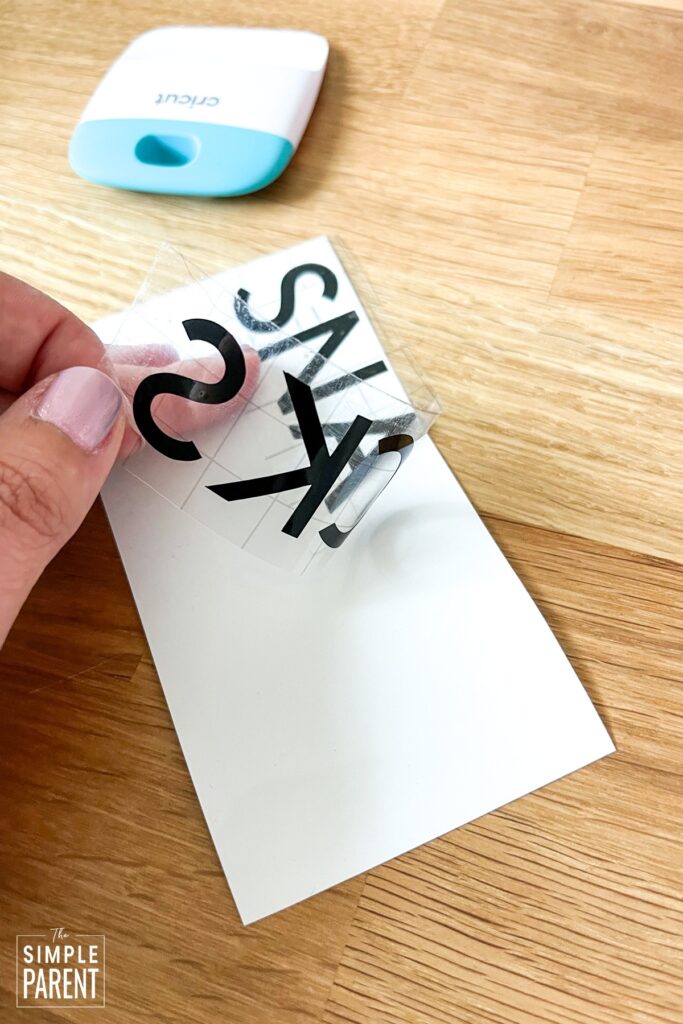
Once everything is cut, remove the excess vinyl from the backing. Use the weeding tool to remove any small pieces of vinyl that might be left in the letters.
Then cover the entire design with transfer tape and run the scraper around the edges of the design to make sure the transfer tape is pressed down onto all of the letters. You don’t want the edges of the letters to stay on the backing. They might if you don’t use the scraper well on all of the edges.
After smoothing the transfer tape on top of your design, peel it carefully off of the backing. Make sure all of the letters come off onto the tape. Then position it on the tray you want to label. Use the scraper to smooth over all of the letters, paying close attention to the edges.
Then lift the transfer tape carefully off the vinyl letters to leave your label on the plastic!

With a few easy steps, you can put together and personalize a kids survival kit for the next time your family hits the road. This car kit works well for road trips or even just long trips around town. You’ll make sure that you have everything you need when you’re on the road.
SHOP CRICUT NOW and then let me know how your project turns out!

Leave a Reply