Homemade Peanut Butter Eggs are one of those Easter treats that taste just as good as the store-bought version but are so much easier to make than you’d think. With just three ingredients and about 30 minutes of hands-on time, you can have a batch of chocolate peanut butter eggs ready for Easter baskets, class parties, or just snacking.
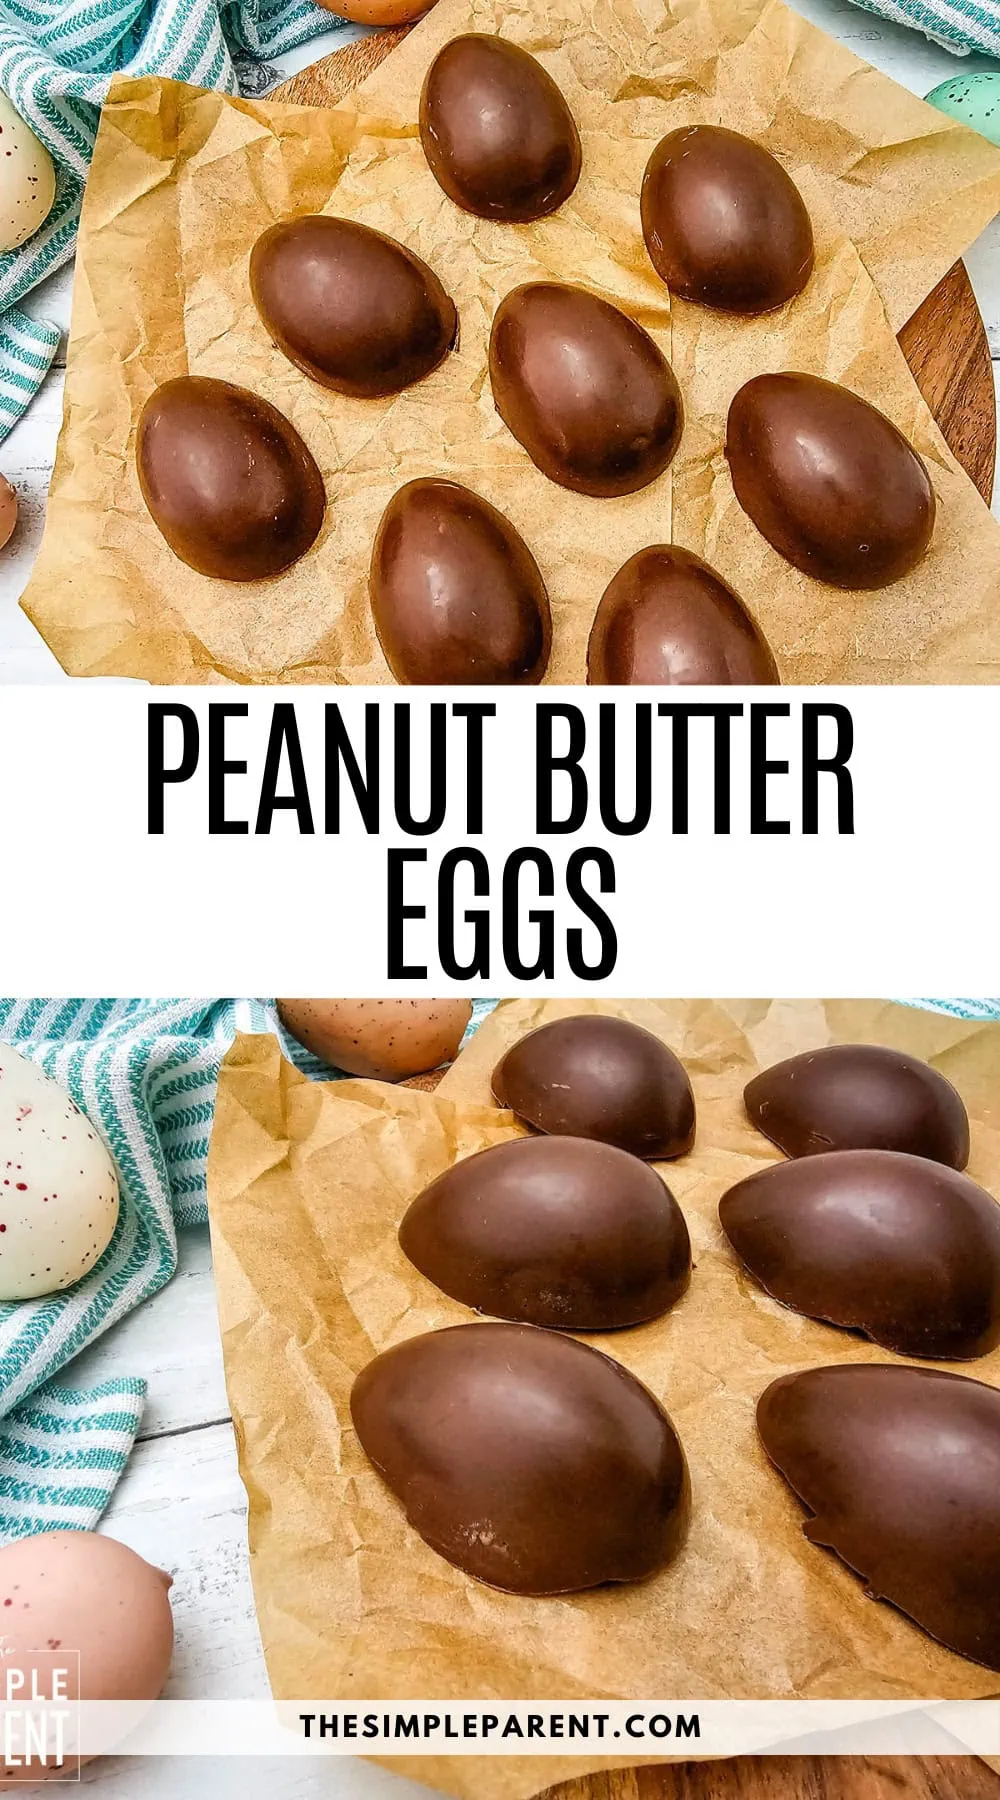
Homemade Peanut Butter Eggs
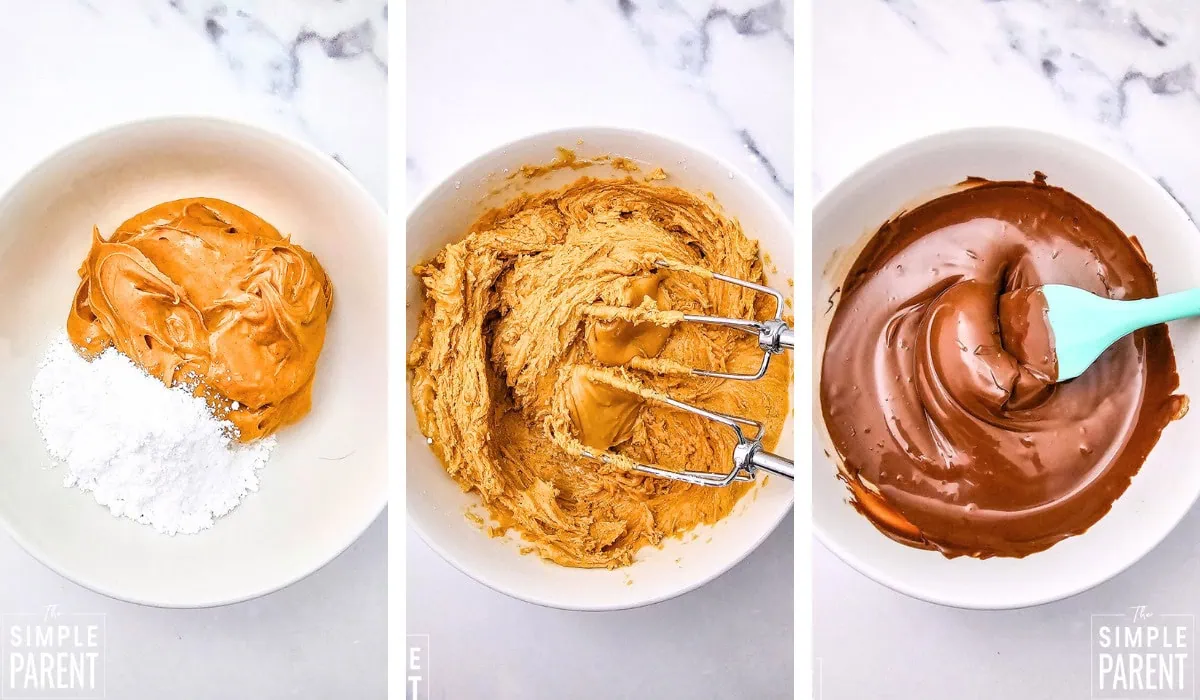
What I love most is how simple the filling is. You just beat peanut butter and powdered sugar together, and that’s it. The chocolate shell gives them that classic candy look, and using egg molds makes the whole process totally foolproof. My kids love helping fill the molds, and honestly, these disappear faster than anything I buy at the store.
Ingredients & Equipment
- Chocolate chips or brick chocolate for melting
- Peanut butter
- Powdered sugar
Full measurements for each ingredient can be found in the printable recipe card at the bottom of this post.
You’ll also need a few things from your kitchen:
- Measuring cups
- Medium bowl and electric mixer or stand mixer
- Silicone spoon
- Microwave safe bowl
- Spoon
- Egg shaped molds
Step By Step Directions
This recipe makes 16 servings. It takes 30 minutes of prep time and 30 minutes to 1 hour of freeze time to set.
Step 1. Beat the peanut butter and powdered sugar together until smooth.
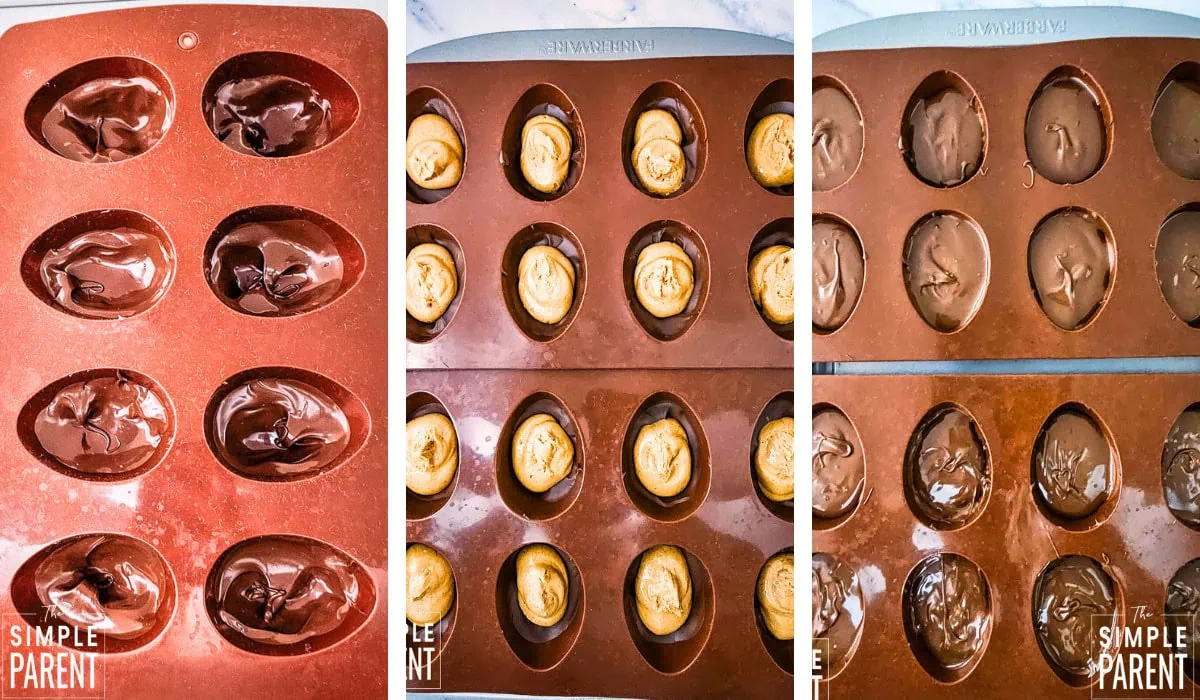
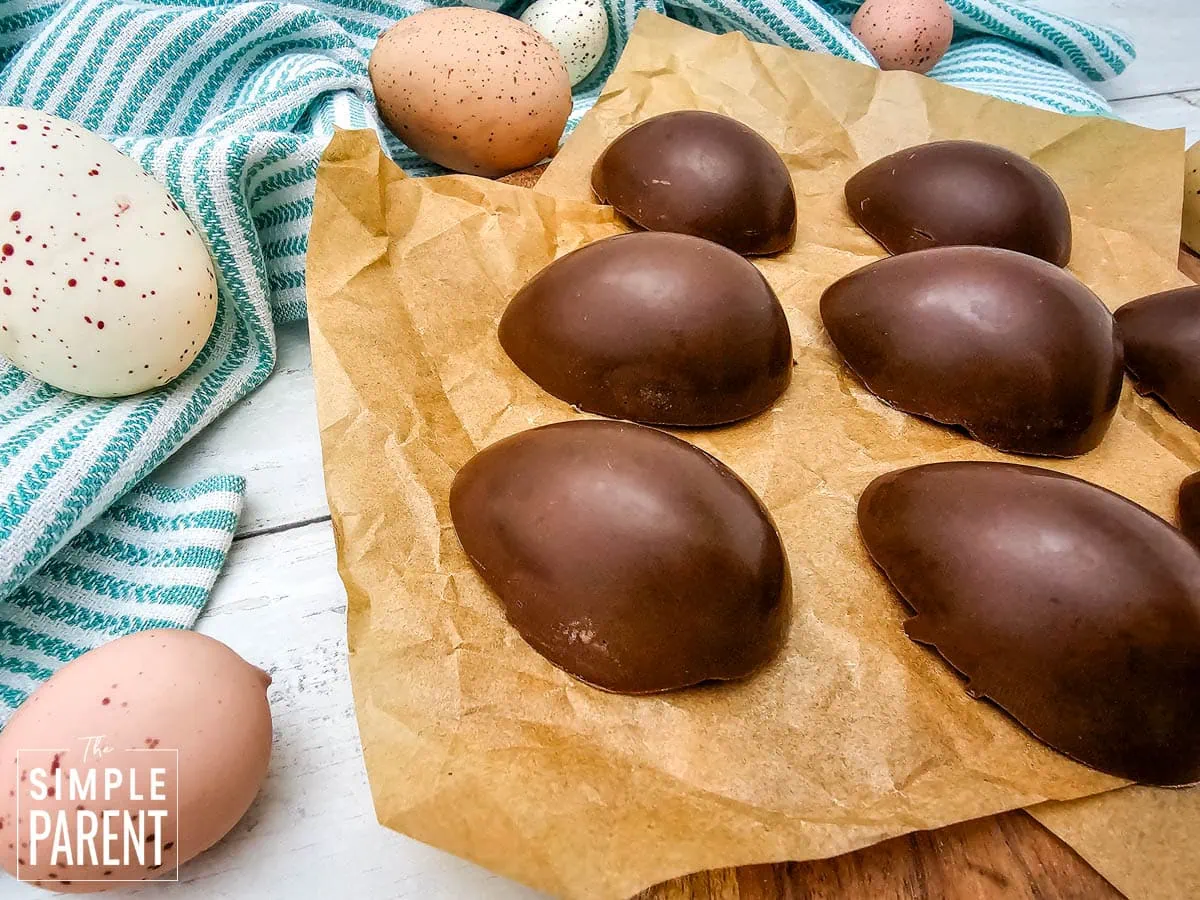
Step 2. Melt half the chocolate and coat the bottom and up halfway on the sides of each egg mold. Freeze for 15 minutes.
Step 3. Spoon or pipe the peanut butter filling into the center of each chocolate coated egg.
Step 4. Melt the rest of the chocolate and top the peanut butter filling with it, filling only just above the halfway mark.
Step 5. Freeze for 15 minutes to set.
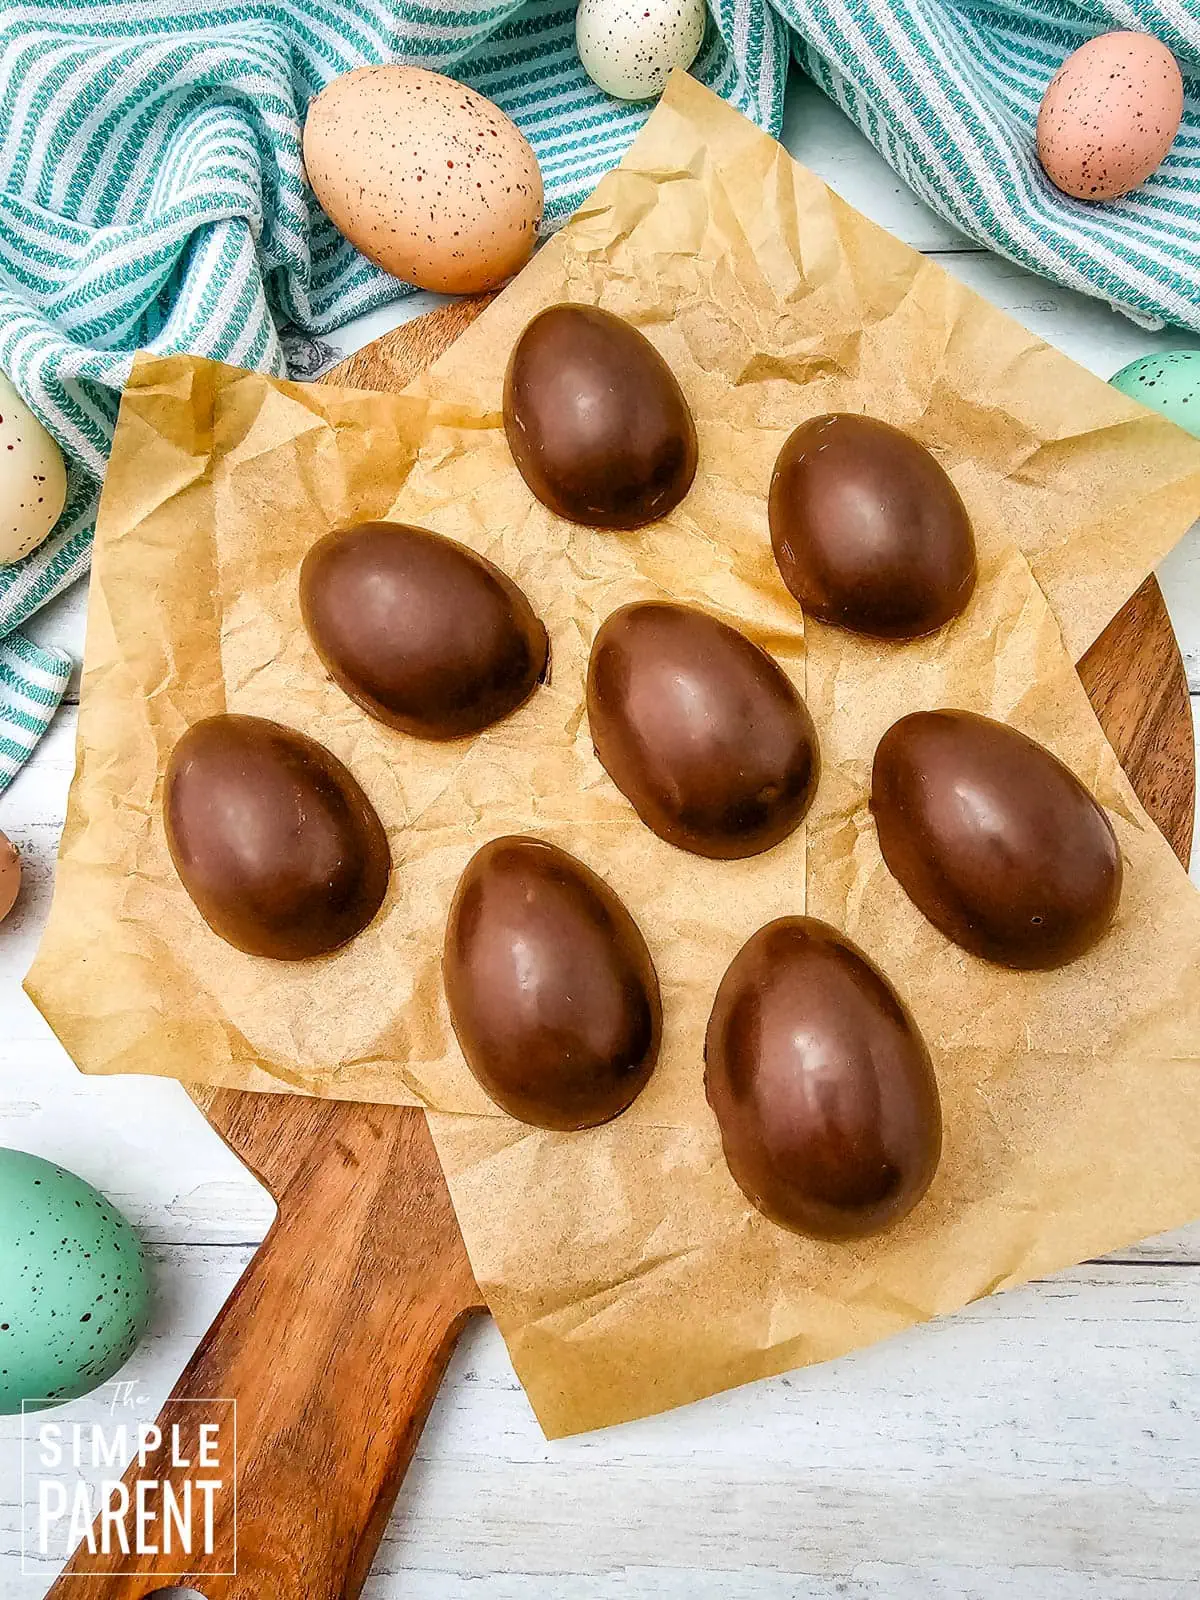
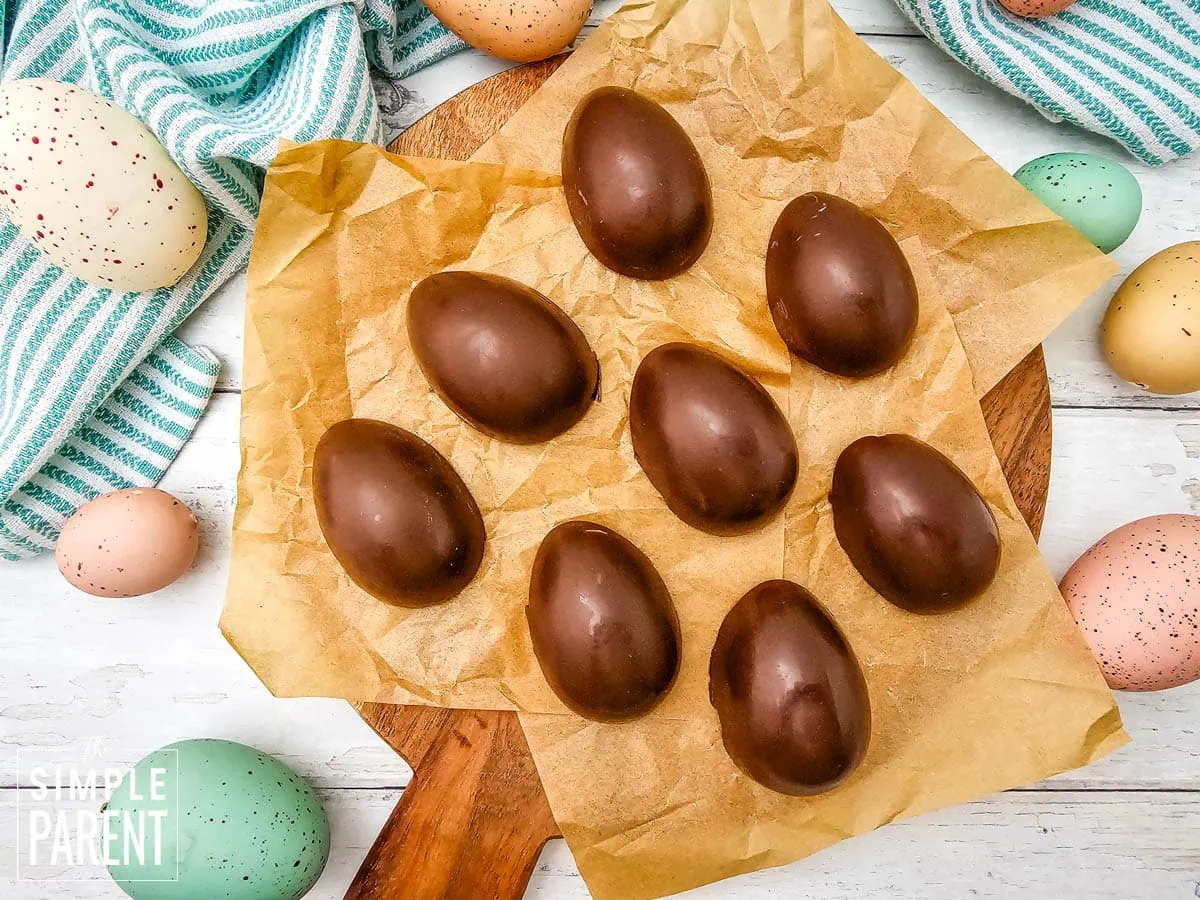
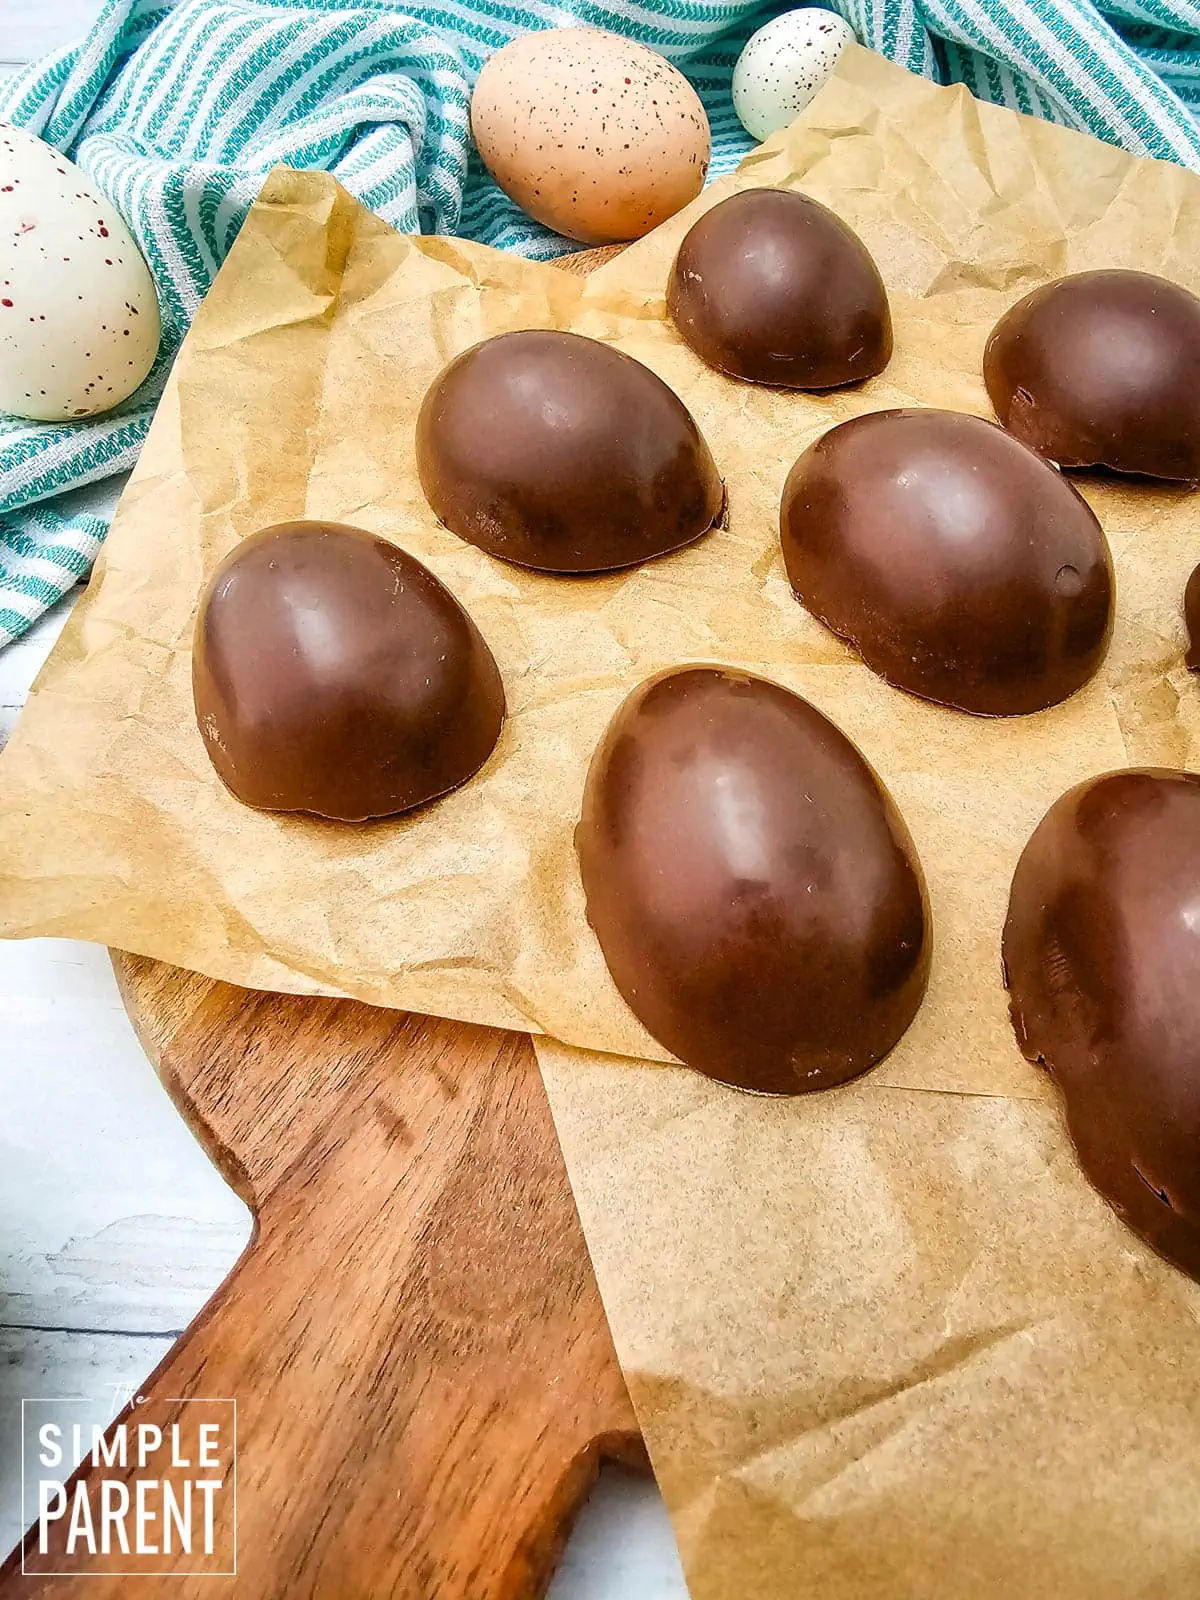
Step 6. Unmold and enjoy!
Variations
- White Chocolate Peanut Butter Eggs: Use white chocolate chips instead of milk or dark chocolate for a different look and flavor. These are especially pretty for Easter.
- Chocolate Peanut Butter Eggs with a Crunch: Mix a couple tablespoons of Rice Krispies into the peanut butter filling for a little added texture.
- Dark Chocolate Version: Swap in dark chocolate chips for a richer, less sweet shell that pairs really well with the sweet peanut butter filling.
- Almond Butter Eggs: Use almond butter or sunflower seed butter in place of peanut butter for a nut-free option that still tastes great.
- Drizzled Eggs: After unmolding, drizzle the tops with melted white chocolate or colored candy melts for a more decorative Easter look.
- Sprinkle-Topped Eggs: Press a few sprinkles into the chocolate before it sets for a fun, festive touch the kids will love.
Leftovers & Storage
Store homemade peanut butter eggs in an airtight container in the refrigerator for up to 2 weeks. They also freeze really well for up to 2 months, so you can make them well ahead of Easter. Just let them sit at room temperature for a few minutes before eating if you prefer them slightly softer.
Tips & Tricks
- Use good quality chocolate for the best results. Chocolate chips work fine, but brick chocolate or candy melts will give you a smoother, more professional-looking shell.
- When melting chocolate in the microwave, go in 30-second intervals and stir between each one. This prevents burning and keeps the chocolate smooth.
- Make sure the first layer of chocolate is completely set before adding the peanut butter filling. If it’s still soft, the layers will mix together.
- Don’t overfill the molds. The chocolate and filling together should only come just above the halfway line so the eggs unmold cleanly.
- If the peanut butter filling is too thick to pipe, warm it in the microwave for about 10 seconds to soften it up.
- Silicone molds work best for easy unmolding. A quick flex of the mold and the eggs pop right out.
Recipe FAQs
Can I use any type of chocolate? Yes! Milk chocolate, semi-sweet, dark chocolate, or even white chocolate all work. Candy melts are another option and come in lots of colors if you want to get creative for Easter.
Do I have to use egg molds? Egg molds make the process really easy, but you can also shape the peanut butter filling by hand into egg shapes, freeze them, then dip them in melted chocolate using a fork.
Can I make these ahead of time? Absolutely. These are a perfect make-ahead Easter treat. Store them in the fridge for up to 2 weeks or freeze them for up to 2 months.
Why is my chocolate cracking when I unmold the eggs? This usually happens if the chocolate layer is too thin. Make sure you’re coating the bottom and sides of the mold generously so the shell is sturdy enough to hold together.
Can I use crunchy peanut butter? You can, but the filling won’t be as smooth. If you like a little texture, go for it. Otherwise, creamy peanut butter gives you the best results.
How do I melt the chocolate without it seizing? Make sure no water gets into the chocolate, and melt it in short bursts in the microwave (30 seconds at a time, stirring in between). You can also use a double boiler on the stove if you prefer more control.
More Easter Recipes
- Easter Bunny Bait Chex Mix
- Easter Blossom Cookies
- Carrot Cake Blondies
- Funfetti Cheesecake Bars
- Funfetti Dip
- Strawberry Fudge
- Strawberry Shortcake Puppy Chow
- No Bake Lemonade Pie
- Homemade Butter Mints
Equipment
Ingredients
- 12 oz chocolate chips or brick chocolate for melting
- ¾ cup peanut butter
- ½ cup powdered sugar
Instructions
- Beat the peanut butter and powdered sugar together until smooth.
- Melt half of the chocolate and coat the bottom and halfway up the sides of each egg mold. Freeze for 15 minutes.
- Spoon or pipe the peanut butter filling into the center of each chocolate-coated egg.
- Melt the remaining chocolate and spoon it over the peanut butter filling, filling just above the halfway mark.
- Freeze for 15 minutes, or until set.
- Unmold and enjoy!
Notes
Pin This Post
Leave a Reply