Charcuterie boards are popular these days and I’m a huge fan. I’ve discovered the amazing world of charcuterie boards too! I’ve seen breakfast boards, dessert boards, and my favorite — the candy charcuterie board!
The reason I love the candy board idea is that it’s perfect for so many different occasions! You can make a candy platter for Valentine’s Day, Halloween, and Christmas! For a non-holiday idea, try making a movie night candy charcuterie board using the easy ideas below!
This post is sponsored by Cricut.

MOVIE NIGHT CANDY CHARCUTERIE BOARD
Making a candy charcuterie board might look intimidating but if you follow a few easy steps, you can put together a board that will add a little something special to your movie night!
With help from my Cricut Explore, I’ll also show you how easy it is to personalize your candy board. Making a Cricut serving tray with your own decals is a simple way to make a template for your charcuterie board or create a fun gift idea for friends and family!
CANDY TRAY IDEAS
The first step is finding a candy board, platter, or serving tray that you would like to use for your display.
Some candy board ideas include:
- cutting board
- round tray or platter
- festive shaped dish
- large chips and dip serving dish (this one provides you with some different sized spaces for some guidance)
- large plate or serving dish
You can use almost anything as your candy charcuterie board. If you’re going to make a Halloween charcuterie board or use Christmas candy, I suggest looking for a dish or platter in a festive shape for extra fun.
For this movie night candy board, I bought a round platter with handles. If you’re new to these candy board ideas, I suggest starting with a platter that has sides to help contain the candy!
The size of the board you choose also depends on what you’re using it for. If you’re hosting a larger gathering, then a larger board is more appropriate. But if you’re just planning a family movie night, you might use a smaller candy board.
Craft stores and party stores often have great options that are very affordable.

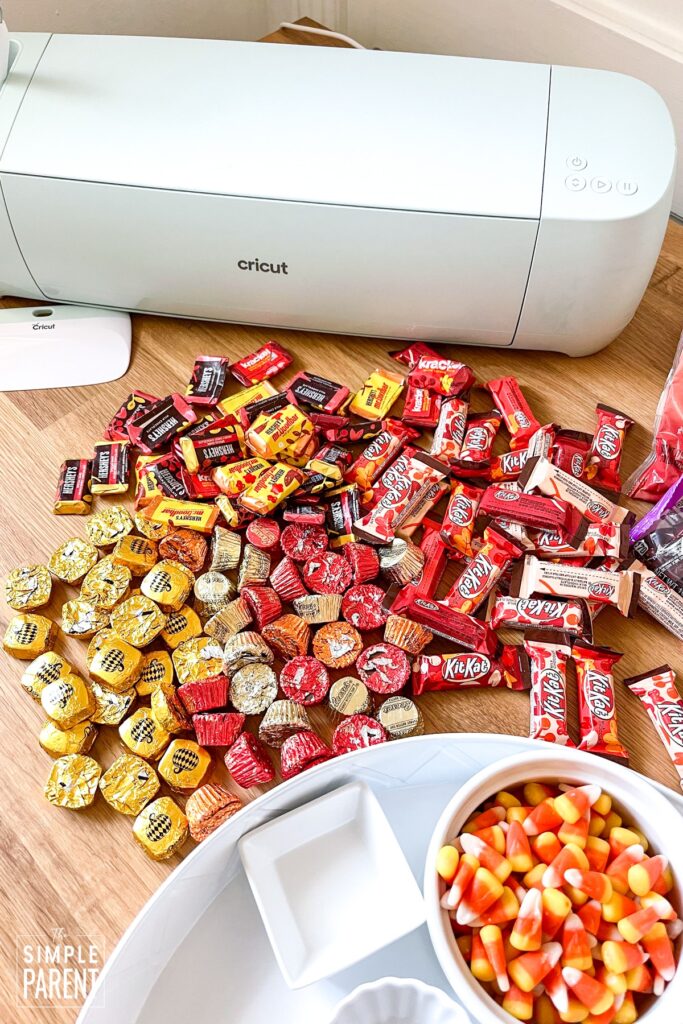
MOVIE NIGHT CANDY IDEAS
Once you’ve picked out your board, the next step is to get a lot of candy. I recommend getting more candy than you think you need.
For movie night, I have a list of basics that I usually go to, including:
- Licorice
- M&Ms
- Skittles
- Gummy Bears
- Jelly Beans
- Peanut Butter Cups
- Dots or Gumdrops
- Tootsie Rolls
- Mini Chocolate Bars
Basically, I include something for everyone in our family. I try to make sure I have at least one of their favorites. For a movie night candy board, I also like to include popcorn for that sweet and salty combination! Since it’s not technically a candy, I don’t always have it on the board. But if I don’t, it’s definitely on the side!
When I make my candy tray, I go for bright colors while also using sweets that people like. The biggest thing is that you don’t skimp on the candy! The board will look the best if it’s overflowing with treats!
For holidays, choosing candy can be even more fun. I suggest choosing a bunch of seasonal candy for a fun and festive candy charcuterie! This time, I went with a fall theme. It would be fun to pair with a family-friendly Halloween movie!

CRICUT SERVING TRAY
We’ve used our Cricut Joy to do a variety of projects around our home including a DIY Kids Survival Kit for the car and DIY Family Command Center.
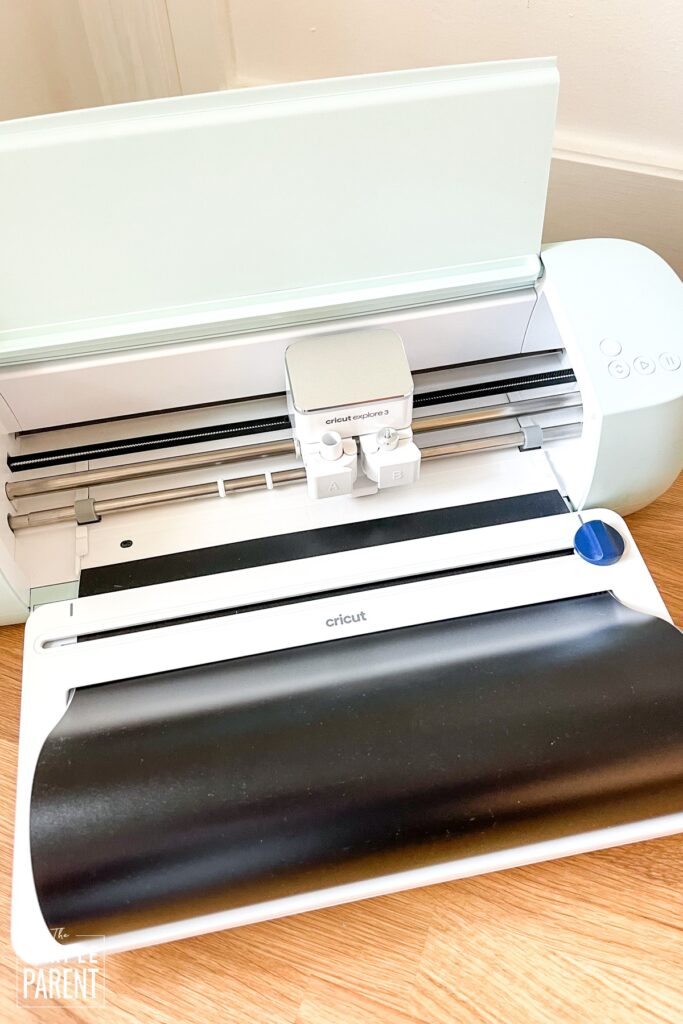
Cricut provided me with a new Cricut Explore 3 and I was excited to use it first for our Easy Silhouette Painting project. Customizing our family candy charcuterie board was a great project for the Cricut Explore 3 due to its larger size. I could have done my vinyl cuts with my Cricut Joy if I needed to but the Explore 3 worked great for this project!
The Cricut Explore 3 works with the new Smart Materials™ and I am a HUGE fan. If you’ve never used these, the load directly into the machine and stay aligned. There is no need to do any manual adjustment and you don’t need a cutting mat. There’s no material prep needed. It makes getting crafty so easy!
There are a variety of different Smart Materials available including:
CUSTOM CRICUT SERVING TRAY MATERIALS
- Cricut Explore 3
- Black Smart Vinyl™
- Cricut Transfer Tape
- Cricut Weeder Tool
- Cricut Scraper
- Serving tray/cutting board
To get started, explore all of the fun fonts and clip art available in Cricut Design Space. I love having Cricut Design Space at my fingertips because it also makes it very simple to find something that will work for the project I want to do. It’s so easy to choose a font that I love and start customizing.
Custom text and labels are some of my favorite types of Cricut projects. So I knew I want to customize our candy board for our family. I know the Cricut Explore 3 would make it easy to do! I decided to use our family name and a cute little “sweets & treats” wording to add to our serving tray.
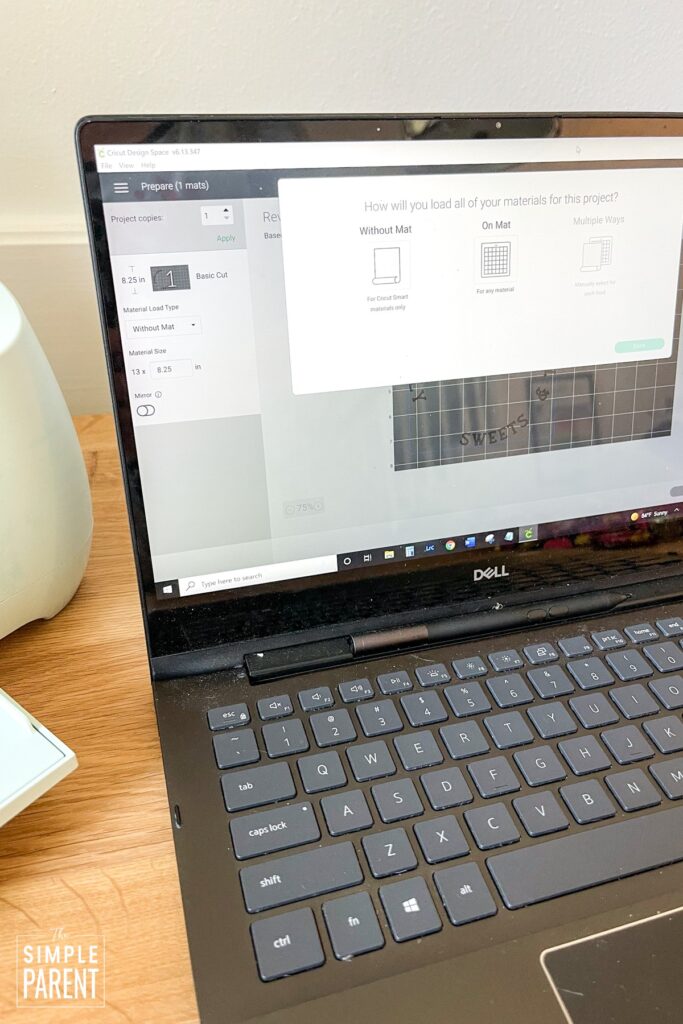
Once you have your project planned out, Design Space takes you step by step through loading the material, making the cuts, and unloading the material.
First Design Space took us through loading the Smart Materials and making the cuts. I highly recommend getting the Cricut Roll Holder for the Explore 3. It keeps rolled material aligned, for clean, precise cuts and has a built-in trimmer so you get a straight edge every time!

After you have your vinyl cut, remove the excess vinyl off the design. If you have other small pieces of vinyl that need to be removed, use the weeding tool to remove any small pieces of vinyl.
Use Cricut Transfer Tape to get your vinyl off of the backing. Cover the design with the transfer tape, then use the scraper to run along all of the edges of your design. You want to make sure you get it all pressed down so when you pull the transfer tape off, the vinyl design comes with it. If you’re doing letters, be sure to get all of the edges so none of the letters stay on the backing or tear when you’re pulling up the transfer tape.

Then place your vinyl design where you would like it on your tray or board.
Repeat the smoothing of the edges with the scraper tool so when you pull back, your vinyl design is left on your candy board!
In just a few easy steps, you’ll have a custom serving tray to use for your candy charcuterie board! I love the custom aspect and think this would be a great gift idea too!

HOW TO MAKE A CANDY CHARCUTERIE BOARD
For family movie night, I like to add popcorn to our candy board ideas. I think it’s a fun addition and makes a great centerpiece surrounded by all of the candy.

I generally try to start with some sort of central focus point, especially if using a round tray or board. I suggest using a small bowl or a few small bowls. They can hold smaller candies or things like popcorn. They also add visual interest to the candy tray.
You can fill in the bowls first or wait until after you finish the board. Then begin filling in around the bowls.

You want to group the same candies together but then also balance as much as you can. I will put the same type of candy bar next to each other but then put something more colorful next to it instead of adding even more chocolate right next to each other.
It doesn’t have to be precisely planned out. Just pay attention to the colors when you’re piling up the different candies. Having a mix of colors, textures, and flavors makes for a more inviting candy charcuterie board!

I filled in our bowls at the end with candy corn and pumpkins. I let a few “spill out” on the other candy to give it a few more pops of color throughout.
You can create a custom serving tray for pretty much any occasion! Top it with these fun candy board ideas and you’ll have a great time! Whether you’re doing family movie night at home or making a dessert charcuterie board for a party, it’s easy to do!
SHOP CRICUT NOW and then let me know how your project turns out!

Threads guy says
This is a great post! I love the customization tips.