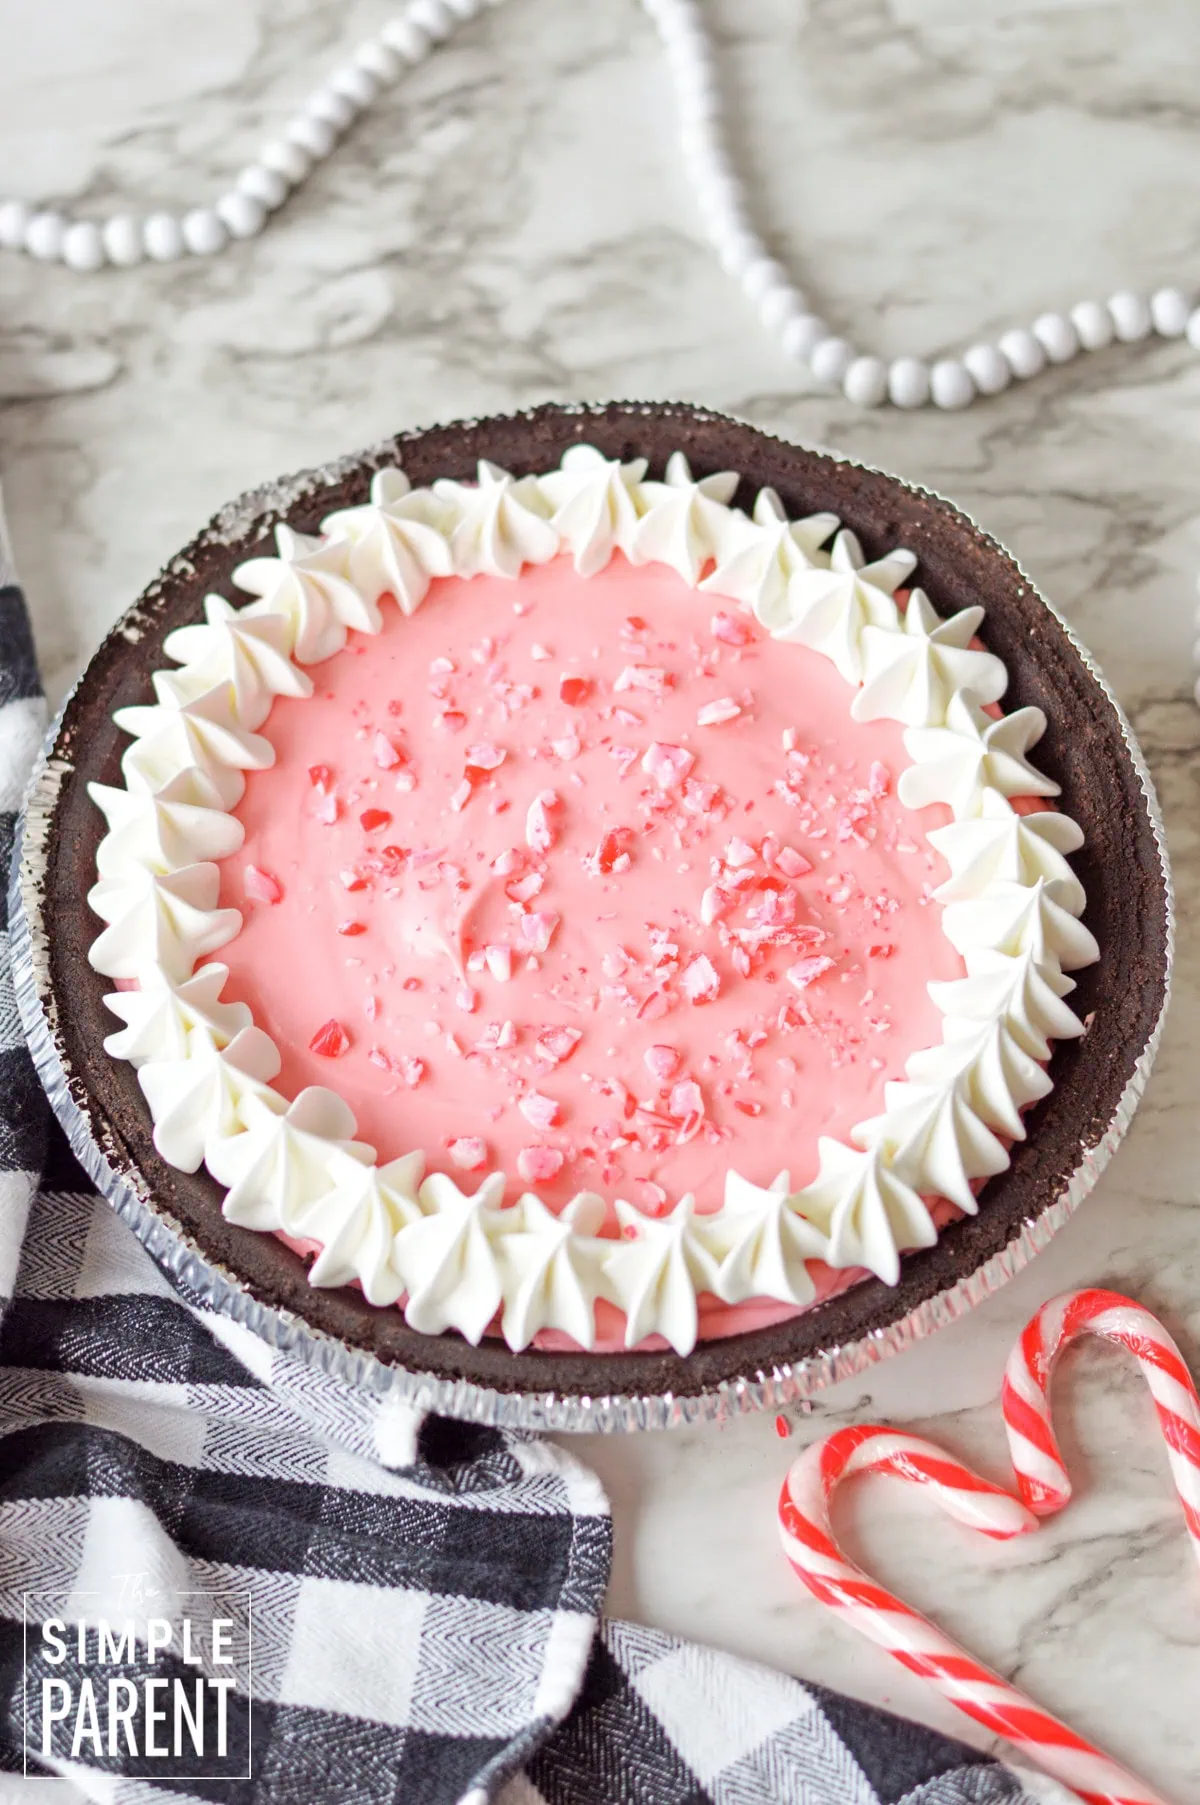
Peppermint Pie is one of those no-bake desserts that looks impressive but takes almost no effort to make. With a store-bought Oreo crust and instant pudding, you can have this festive treat ready for the fridge in about 15 minutes.
No Bake Peppermint Pie
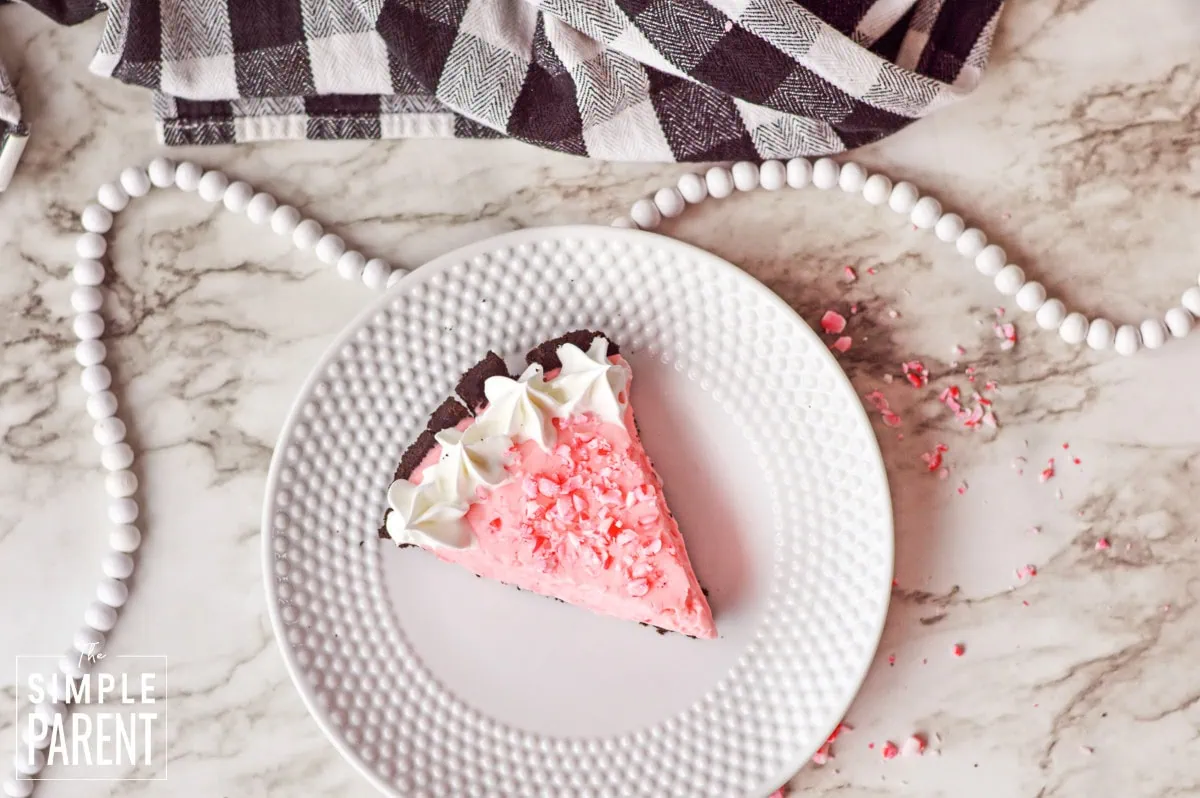
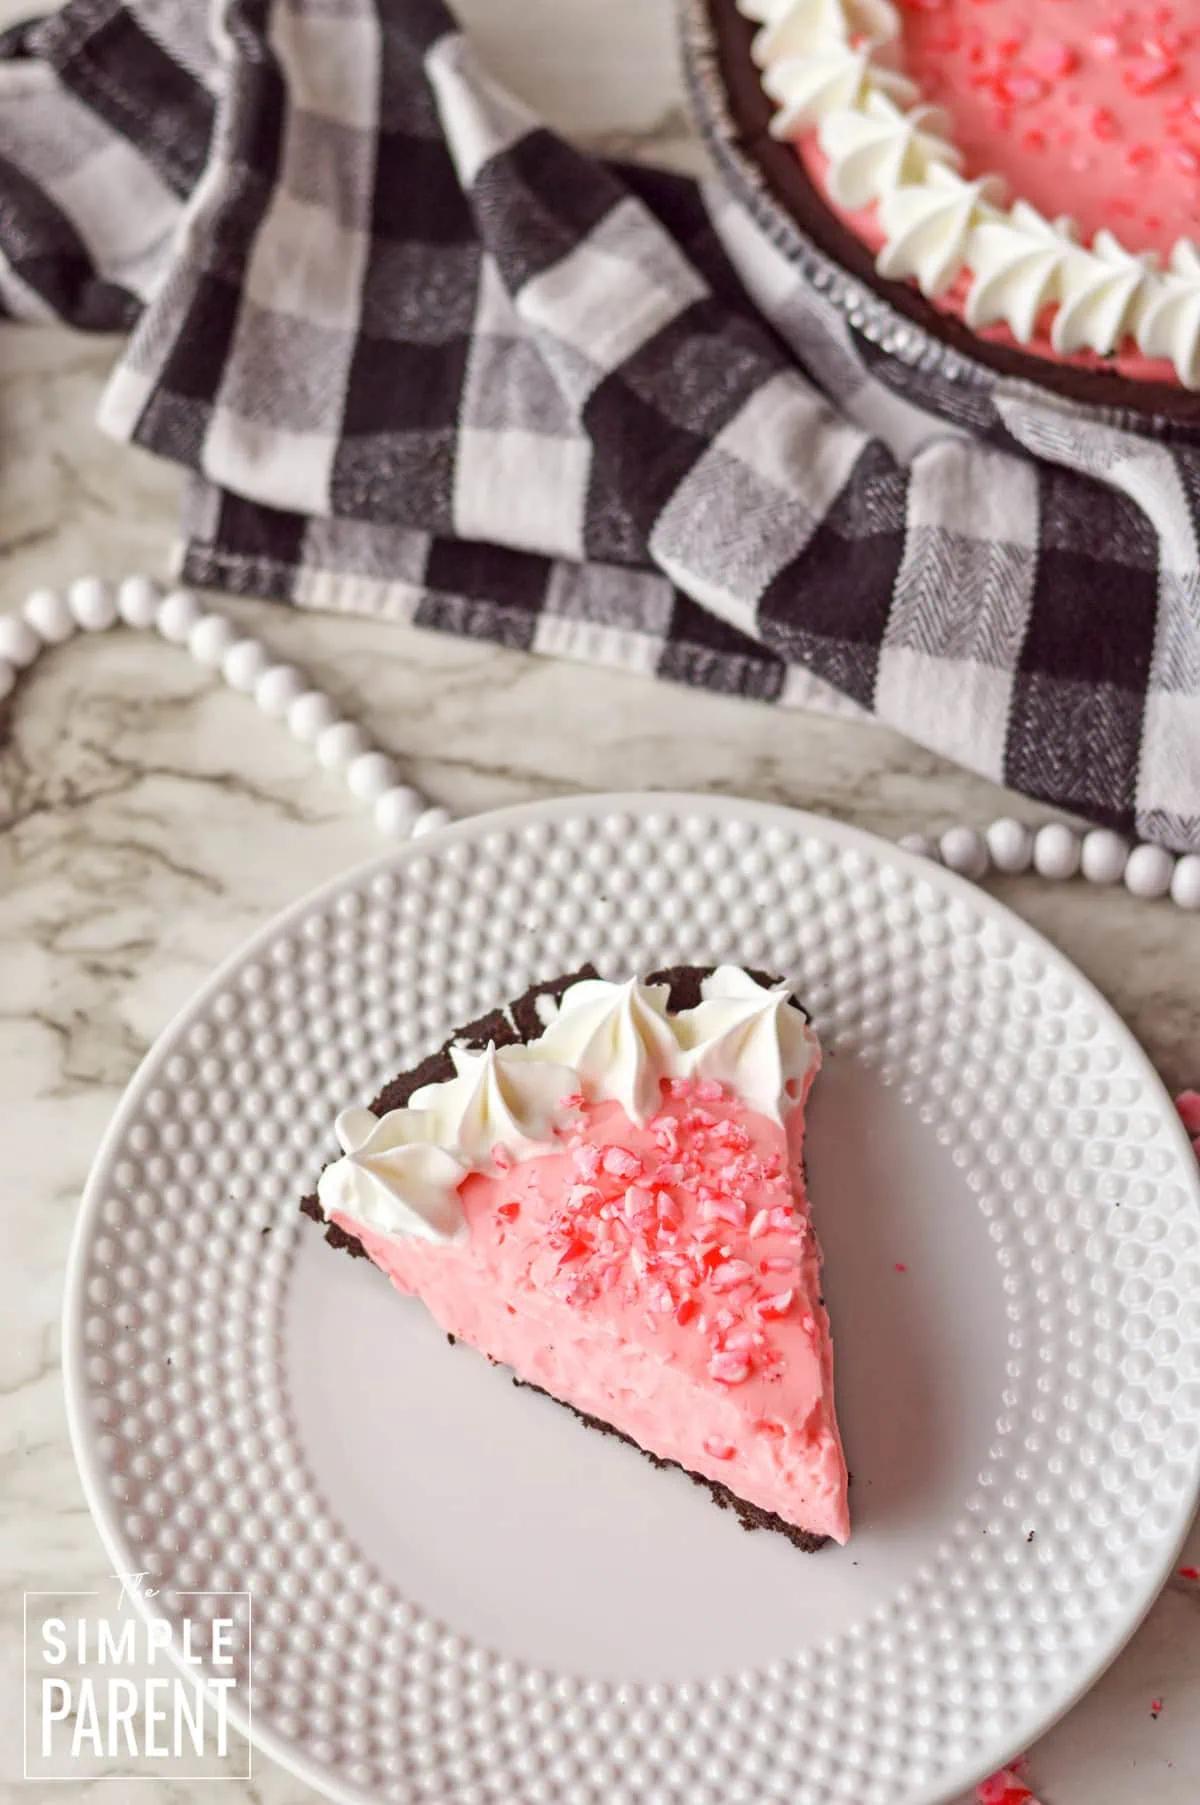
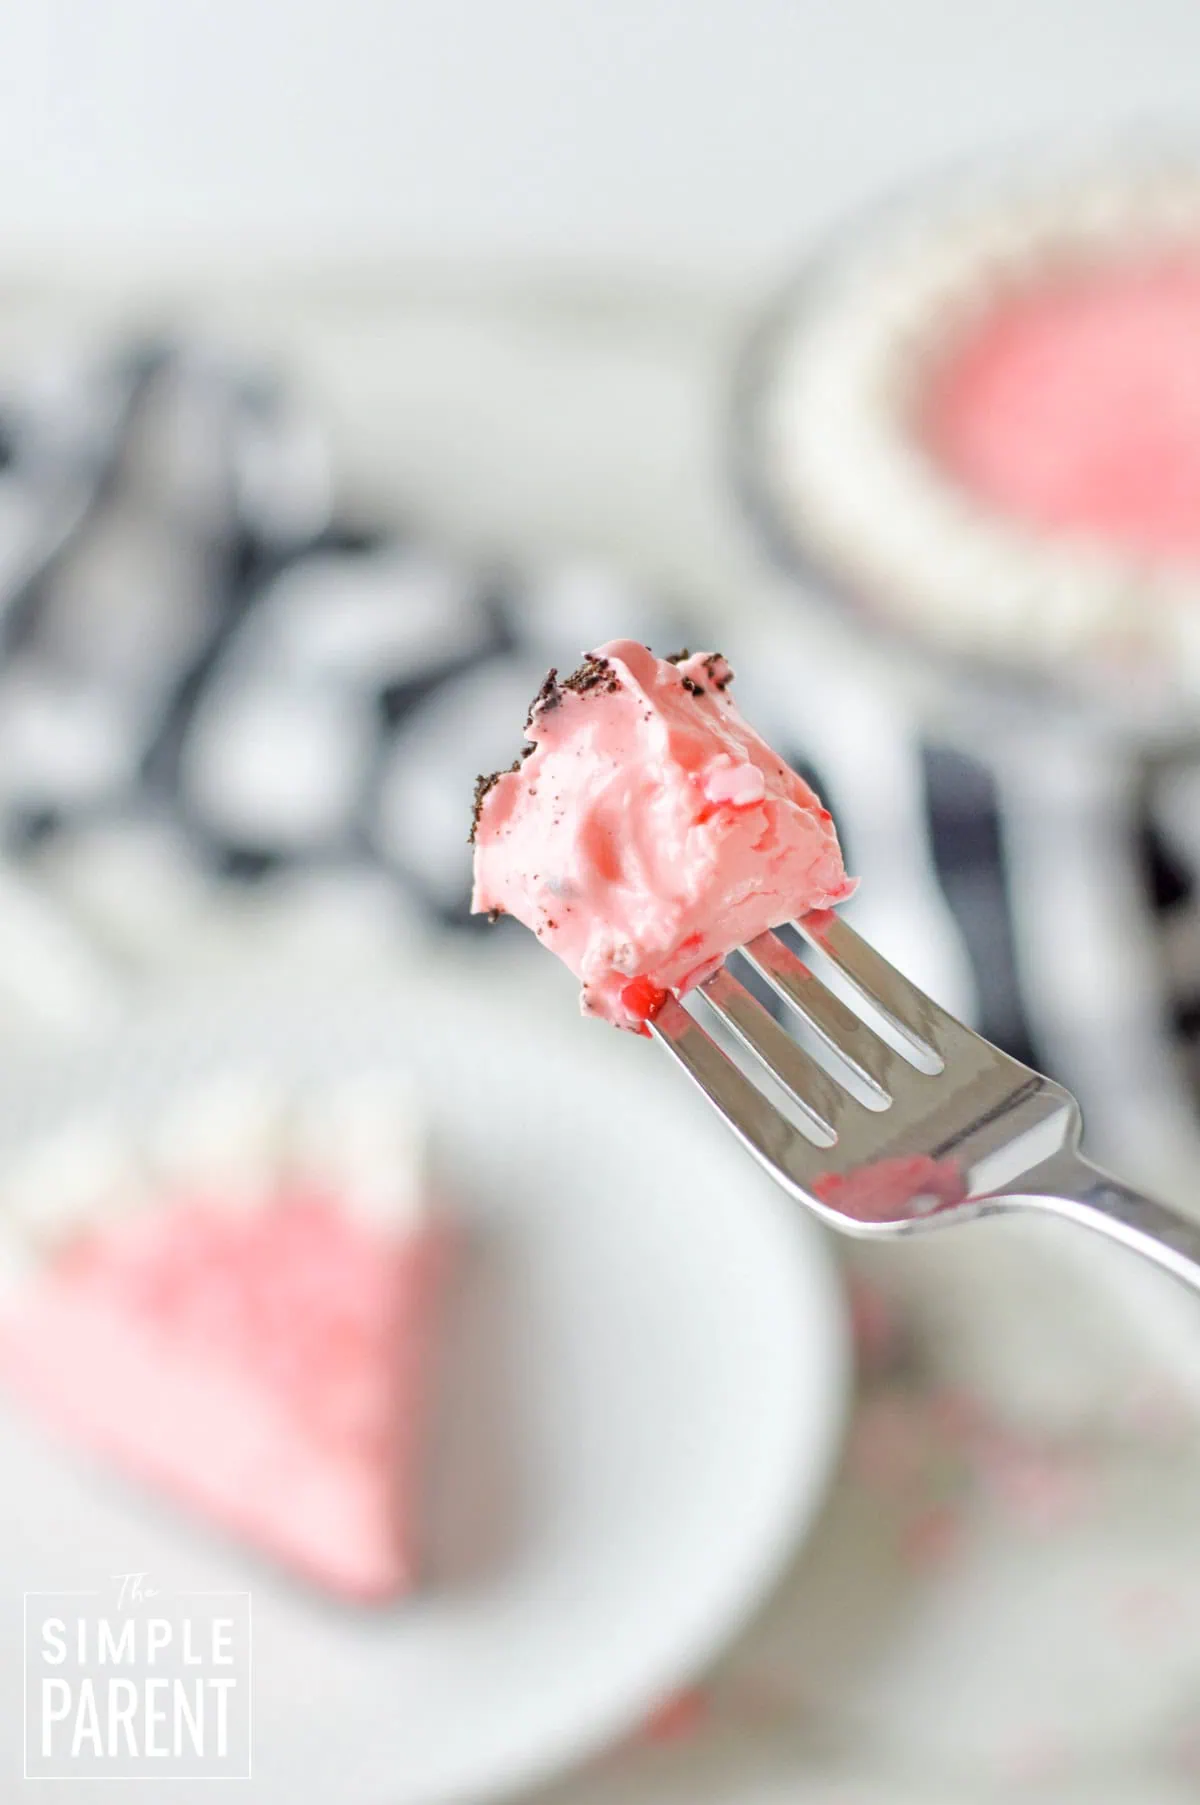
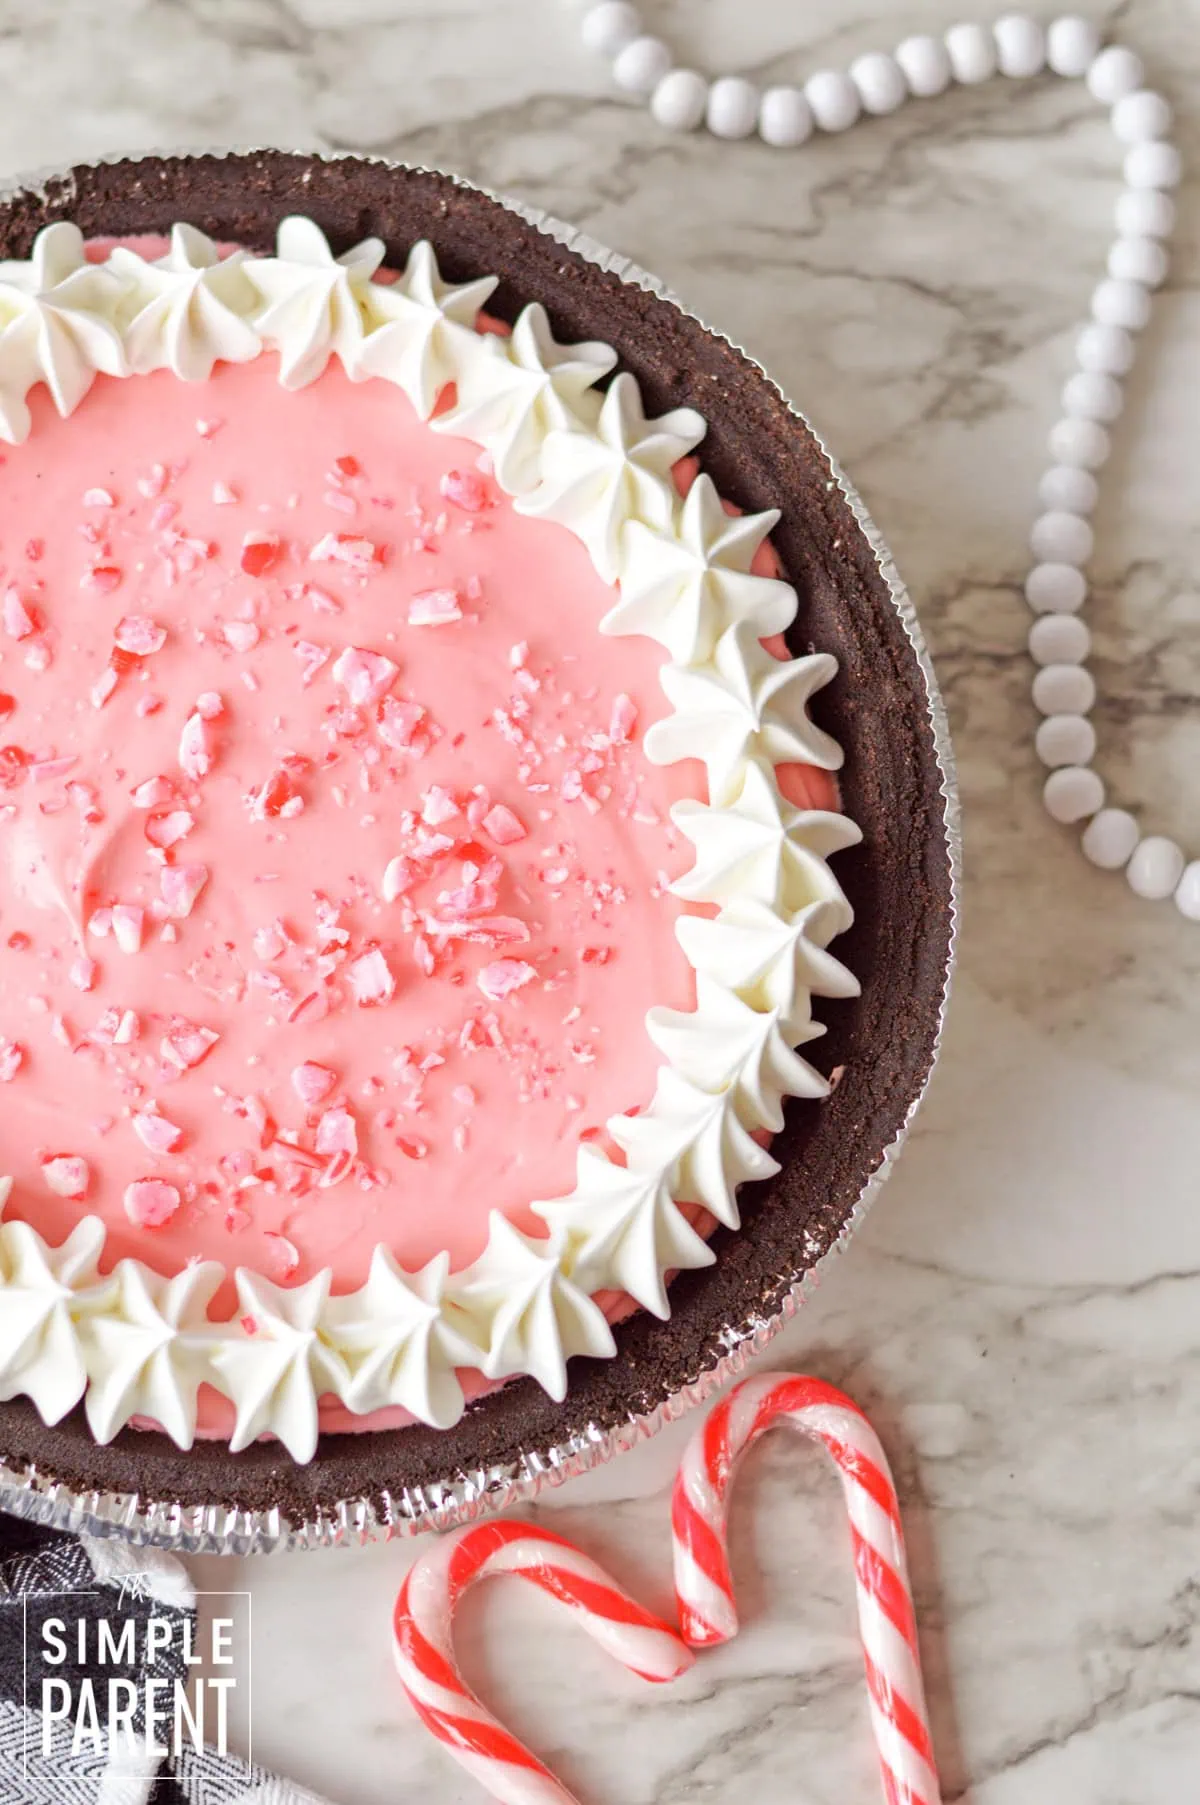
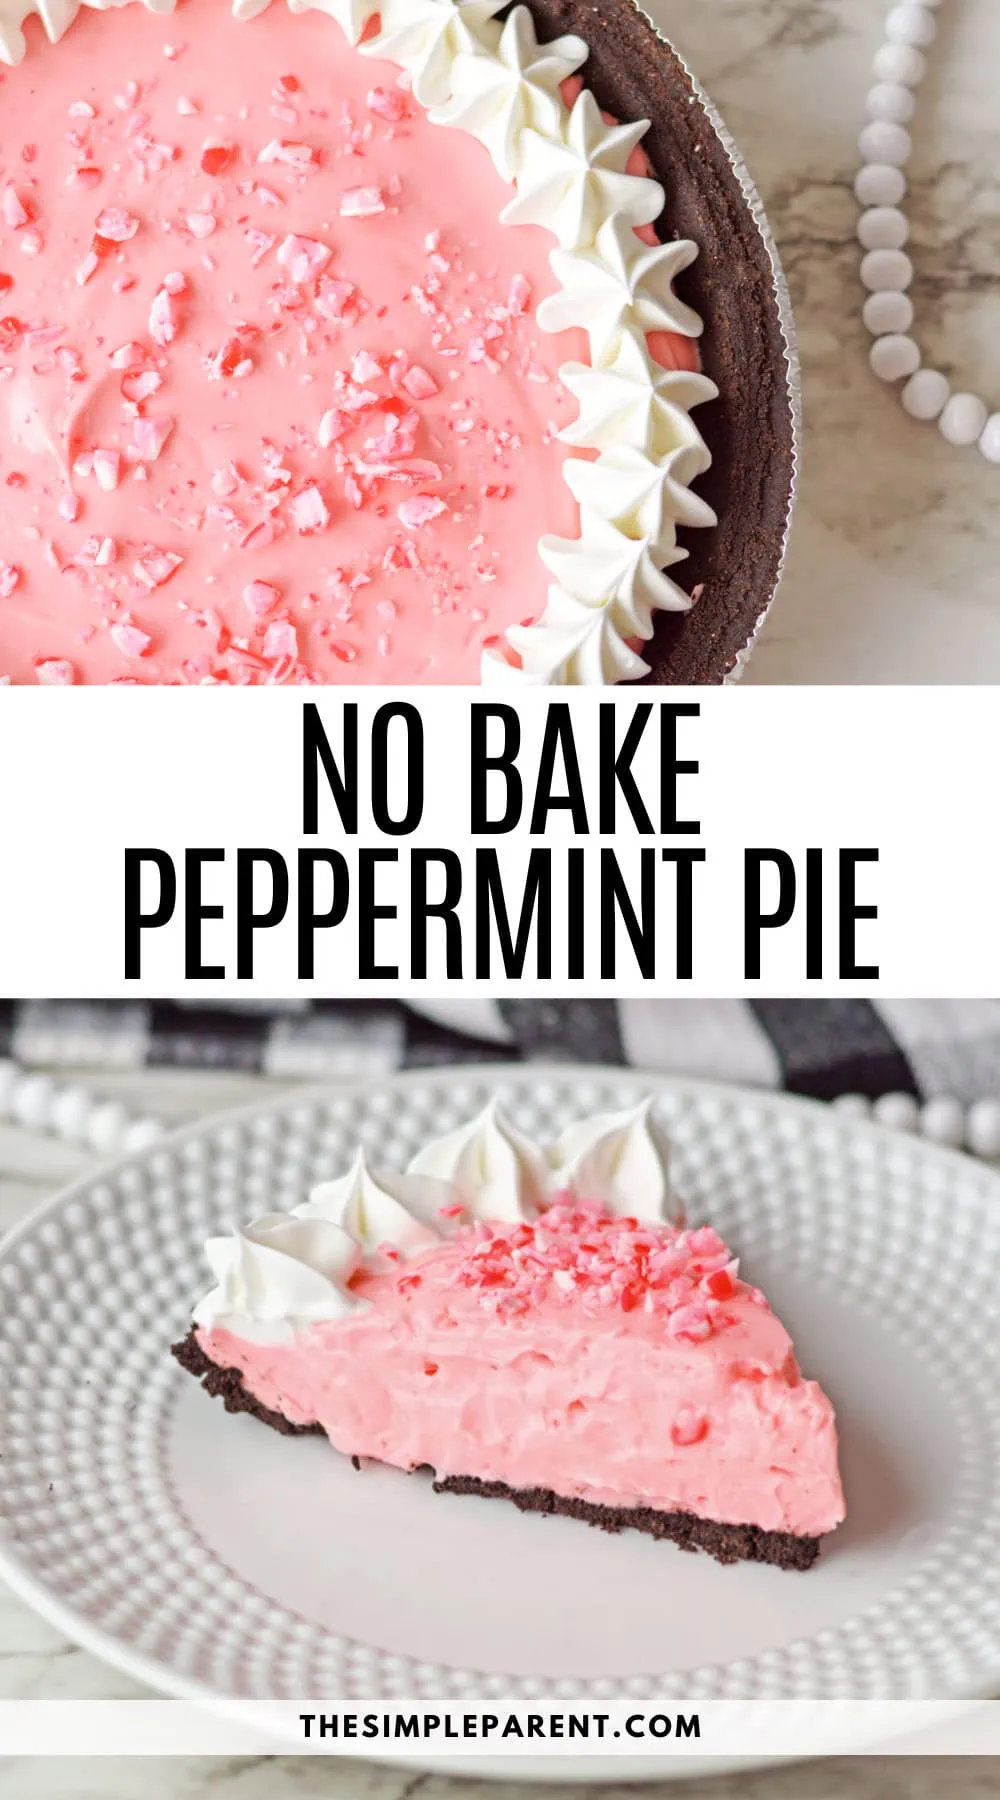
What I love most about this recipe is how simple it is to customize. The pink peppermint filling against that dark chocolate crust is absolutely gorgeous, and the crushed candy canes on top add the perfect crunch. Candy cane pie is of my go-to Christmas desserts because it tastes like the holidays without requiring hours in the kitchen.
Ingredients & Equipment
- Store bought chocolate Oreo crust
- White chocolate instant pudding mix
- Milk
- Peppermint extract
- Whipped topping
- Candy canes
- Red food coloring
Full measurements for each ingredient can be found in the printable recipe card at the bottom of this post.
You’ll also need a few things from your kitchen:
- Large mixing bowl
- Whisk
- Piping bag
- 1M open star piping tip
- Plastic bag or rolling pin for crushing candy canes
Step By Step Directions
This recipe makes 8 servings. It takes 15 minutes of prep time and 4 hours of chill time.
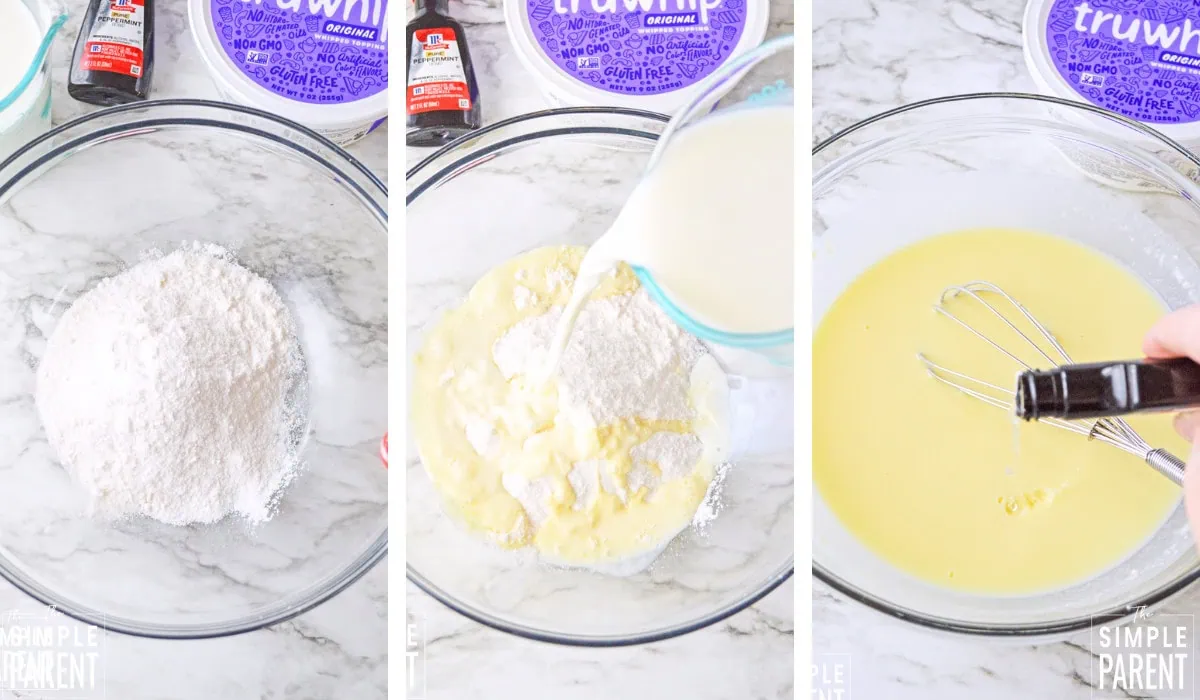
Step 1. In a large mixing bowl, whisk together pudding mixes and milk until well combined.
Step 2. Add peppermint extract and whisk to combine.
Step 3. Add a generous amount of red food coloring and whisk to incorporate.
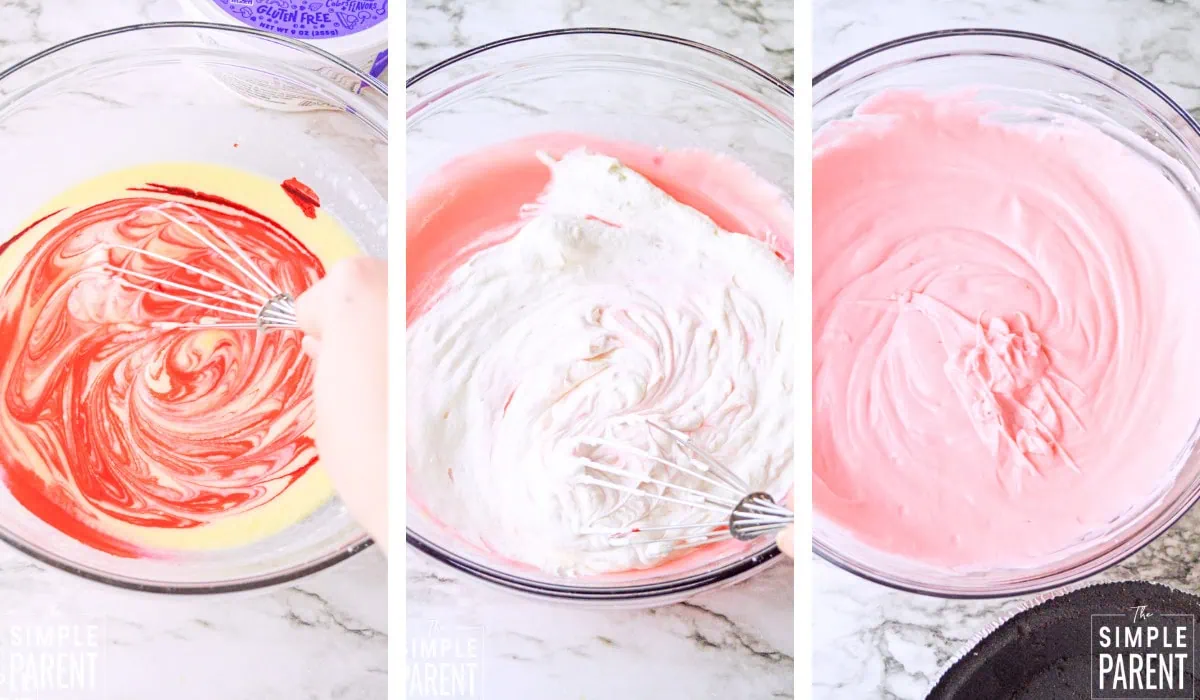
Step 4. Add about 1 cup of the whipped topping and whisk to combine. If needed, you can add a bit more red food coloring at this point to get your desired shade for the pie filling.
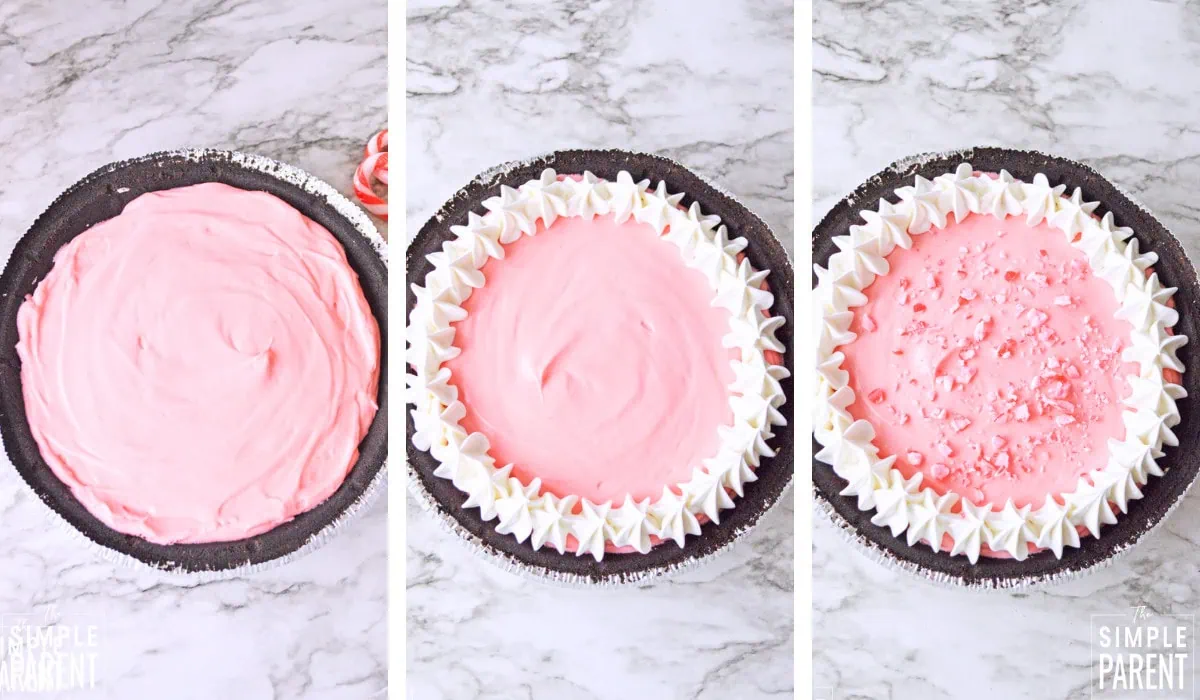
Step 5. Pour the filling into your premade Oreo crust.
Step 6. Cover and move to the refrigerator to chill for at least 4 hours.
Step 7. Before serving, add the remaining whipped topping to a piping bag fitted with a 1M open star tip.
Step 8. Add single squeezes of the whipped topping all the way around the outer edge of the pie.
Step 9. Inside of your whipped topping border, sprinkle crushed candy canes.
Variations
- Chocolate Peppermint Pie: Use chocolate instant pudding instead of white chocolate for a double chocolate version.
- Green Peppermint Pie: Swap the red food coloring for green to create a minty green filling instead.
- Candy Cane Oreo Crust: Crush some candy canes into your crust before adding the filling for extra peppermint flavor throughout.
- Peppermint Bark Topping: Top with chopped peppermint bark pieces instead of crushed candy canes for a different texture.
- Mini Peppermint Pies: Make individual servings using mini Oreo crusts for a party-ready dessert.
Leftovers & Storage
Store leftover Peppermint Pie covered in the refrigerator for up to 4 days. The whipped topping border may soften slightly over time, so it’s best to add the decorative topping and crushed candy canes right before serving if you’re making this ahead. This pie does not freeze well due to the whipped topping.
Tips & Tricks
- Crush your candy canes inside a sealed plastic bag using a rolling pin to keep the mess contained and get evenly sized pieces.
- Start with less food coloring than you think you need since you can always add more, but you can’t take it away.
- Make sure your pudding mixture is fully combined before adding the whipped topping so you don’t end up with lumps.
- Let the pie chill the full 4 hours for the best texture. Rushing this step will give you a runny filling.
- If you don’t have a piping bag, you can simply spread the remaining whipped topping over the pie with a spatula.
- Don’t add the crushed candy canes until right before serving since they can start to dissolve and get sticky if they sit too long.
Recipe FAQs
Can I use homemade whipped cream instead of whipped topping? You can, but stabilized whipped cream works best since regular whipped cream may deflate over time. Cool Whip or similar whipped topping holds its shape better for the decorative border.
How far in advance can I make this pie? You can make the pie filling and let it chill for up to 2 days ahead. Add the whipped topping border and crushed candy canes right before serving for the best presentation.
Can I use a graham cracker crust instead? Yes, a chocolate graham cracker crust works great too. The chocolate pairs perfectly with the peppermint flavor.
Why is my filling runny? The most common reason is not chilling the pie long enough. Make sure it sets for at least 4 hours, or overnight for best results. Also ensure you’re using the correct ratio of milk to pudding mix.
Can I make this without food coloring? Absolutely. Without the red food coloring, the filling will be a pale cream color. It will still taste delicious, just with a different look.
Is this pie gluten-free? The filling is gluten-free, but most store-bought Oreo crusts contain gluten. Look for a gluten-free chocolate cookie crust to make this recipe gluten-free.
More No Bake Christmas Pies & Cakes
- No Bake Oreo Delight
- Chocolate Pudding Pie
- No Bake Pineapple Dream Dessert
- No Bake Pineapple Pie
- Microwave Pumpkin Pie
- Pumpkin Cheesecake Trifle
- Pumpkin Lush
- Caramel Apple Trifle
Equipment
- Rolling Pin or plastic bag for crushed candy canes
Ingredients
- 1 store bought chocolate Oreo crust
- 2 3 oz. boxes of white chocolate instant pudding mix
- 2 cups milk
- ½ tsp. peppermint extract
- 1 8 oz. container of whipped topping, divided
- 2-3 candy canes crushed
- Red food coloring
Instructions
- In a large mixing bowl, whisk together pudding mixes and milk until well combined.
- Add peppermint extract and whisk to combine.
- Add a generous amount of red food coloring and whisk to incorporate.
- Add about 1 cup of the whipped topping and whisk to combine. If needed, you can add a bit more red food coloring at this point to get your desired shade for the pie filling.
- Pour the filling into your premade Oreo crust.
- Cover and move to the refrigerator to chill for at least 4 hours.
- Before serving, add the remaining whipped topping to a piping bag fitted with a 1M open star tip.
- Add single squeezes of the whipped topping all the way around the outer edge of the pie.
- Inside of your whipped topping border, sprinkle crushed candy canes.
Notes
Pin This Post
Leave a Reply