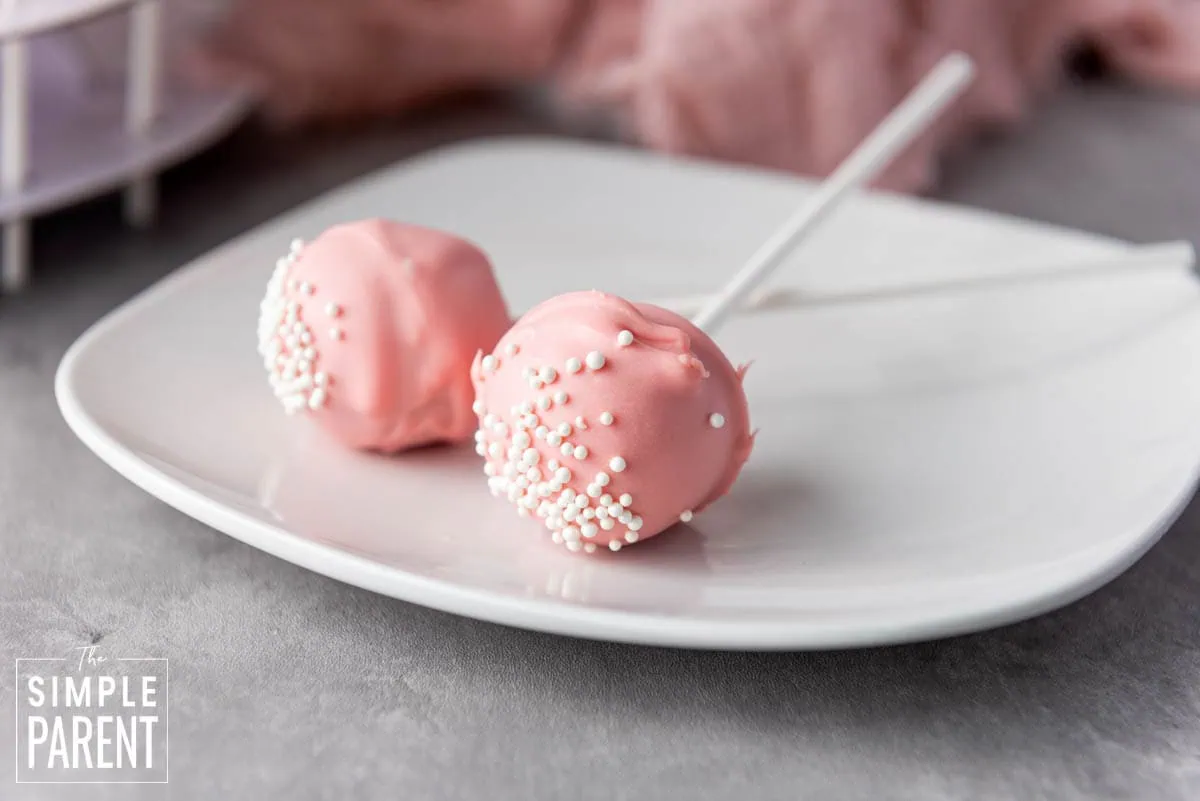
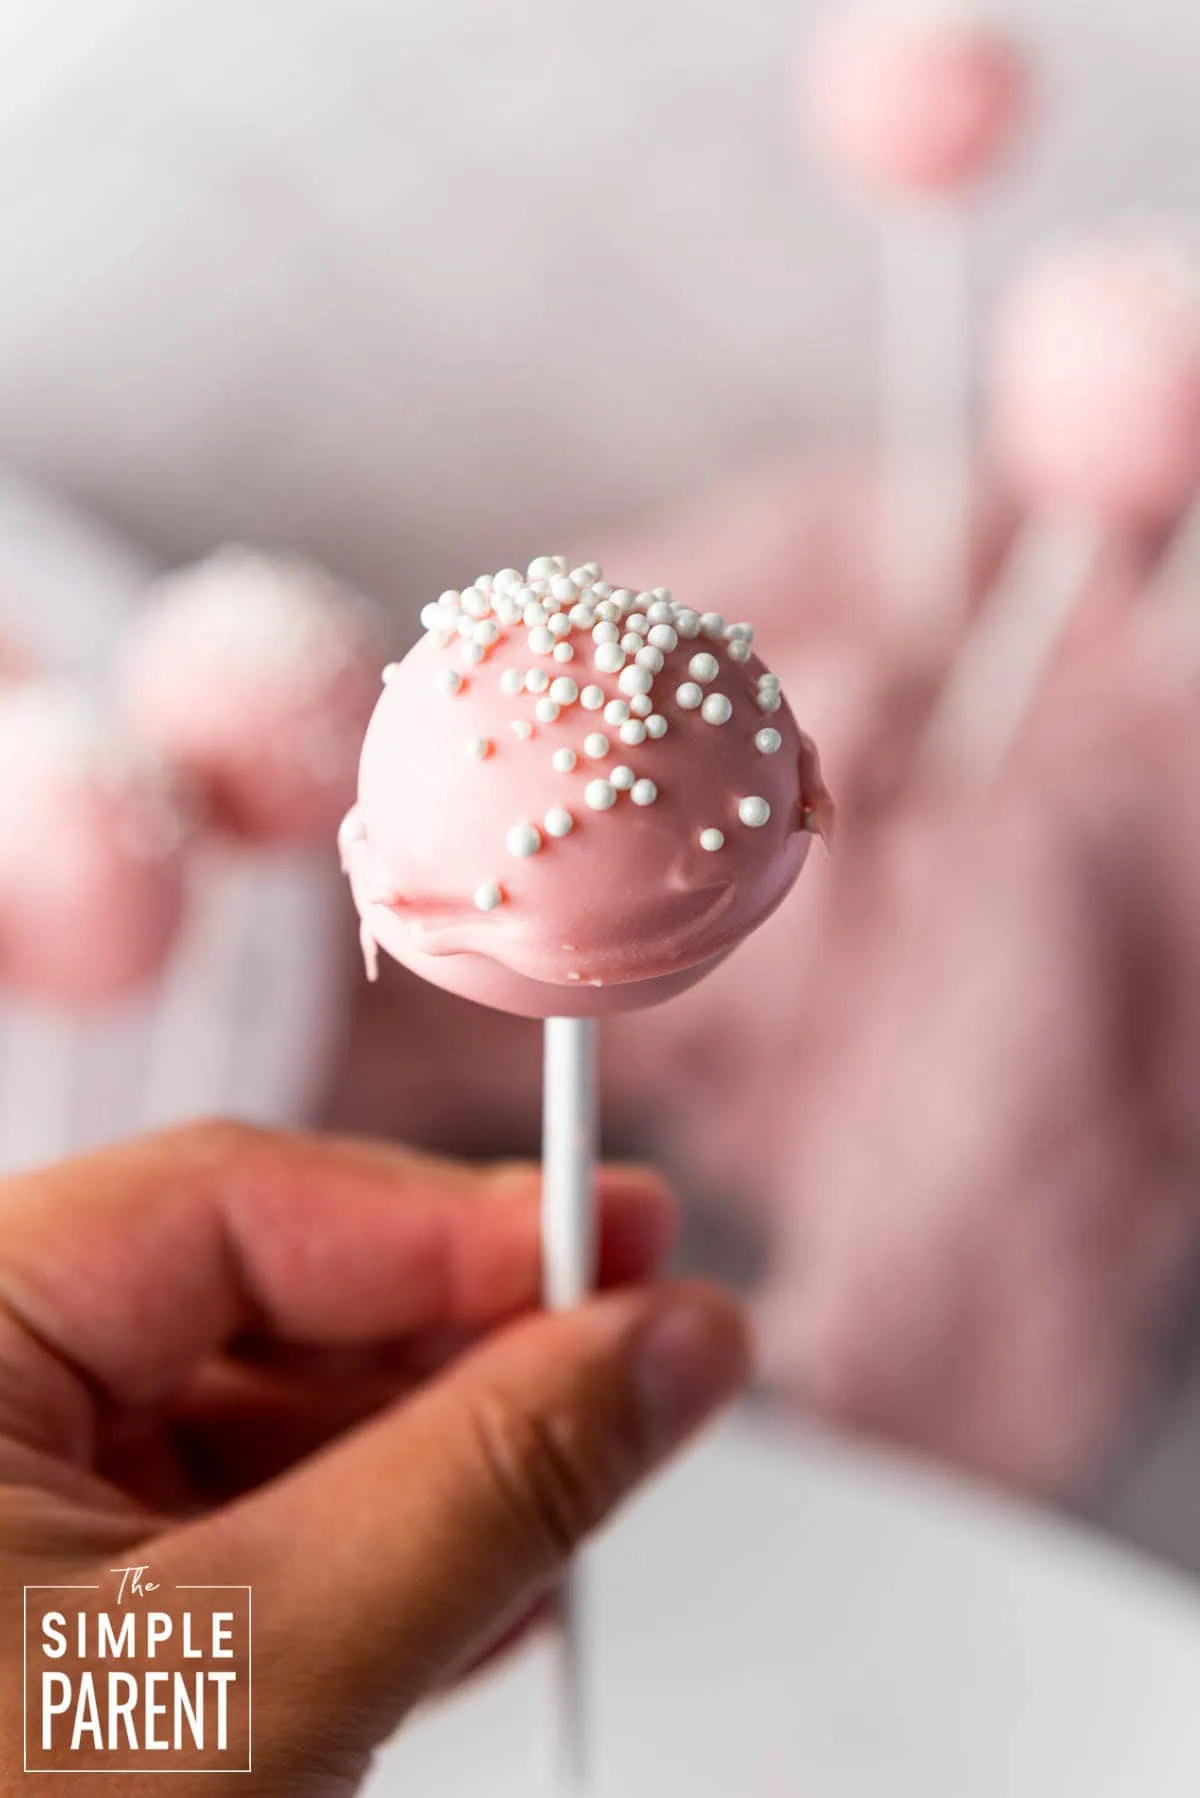
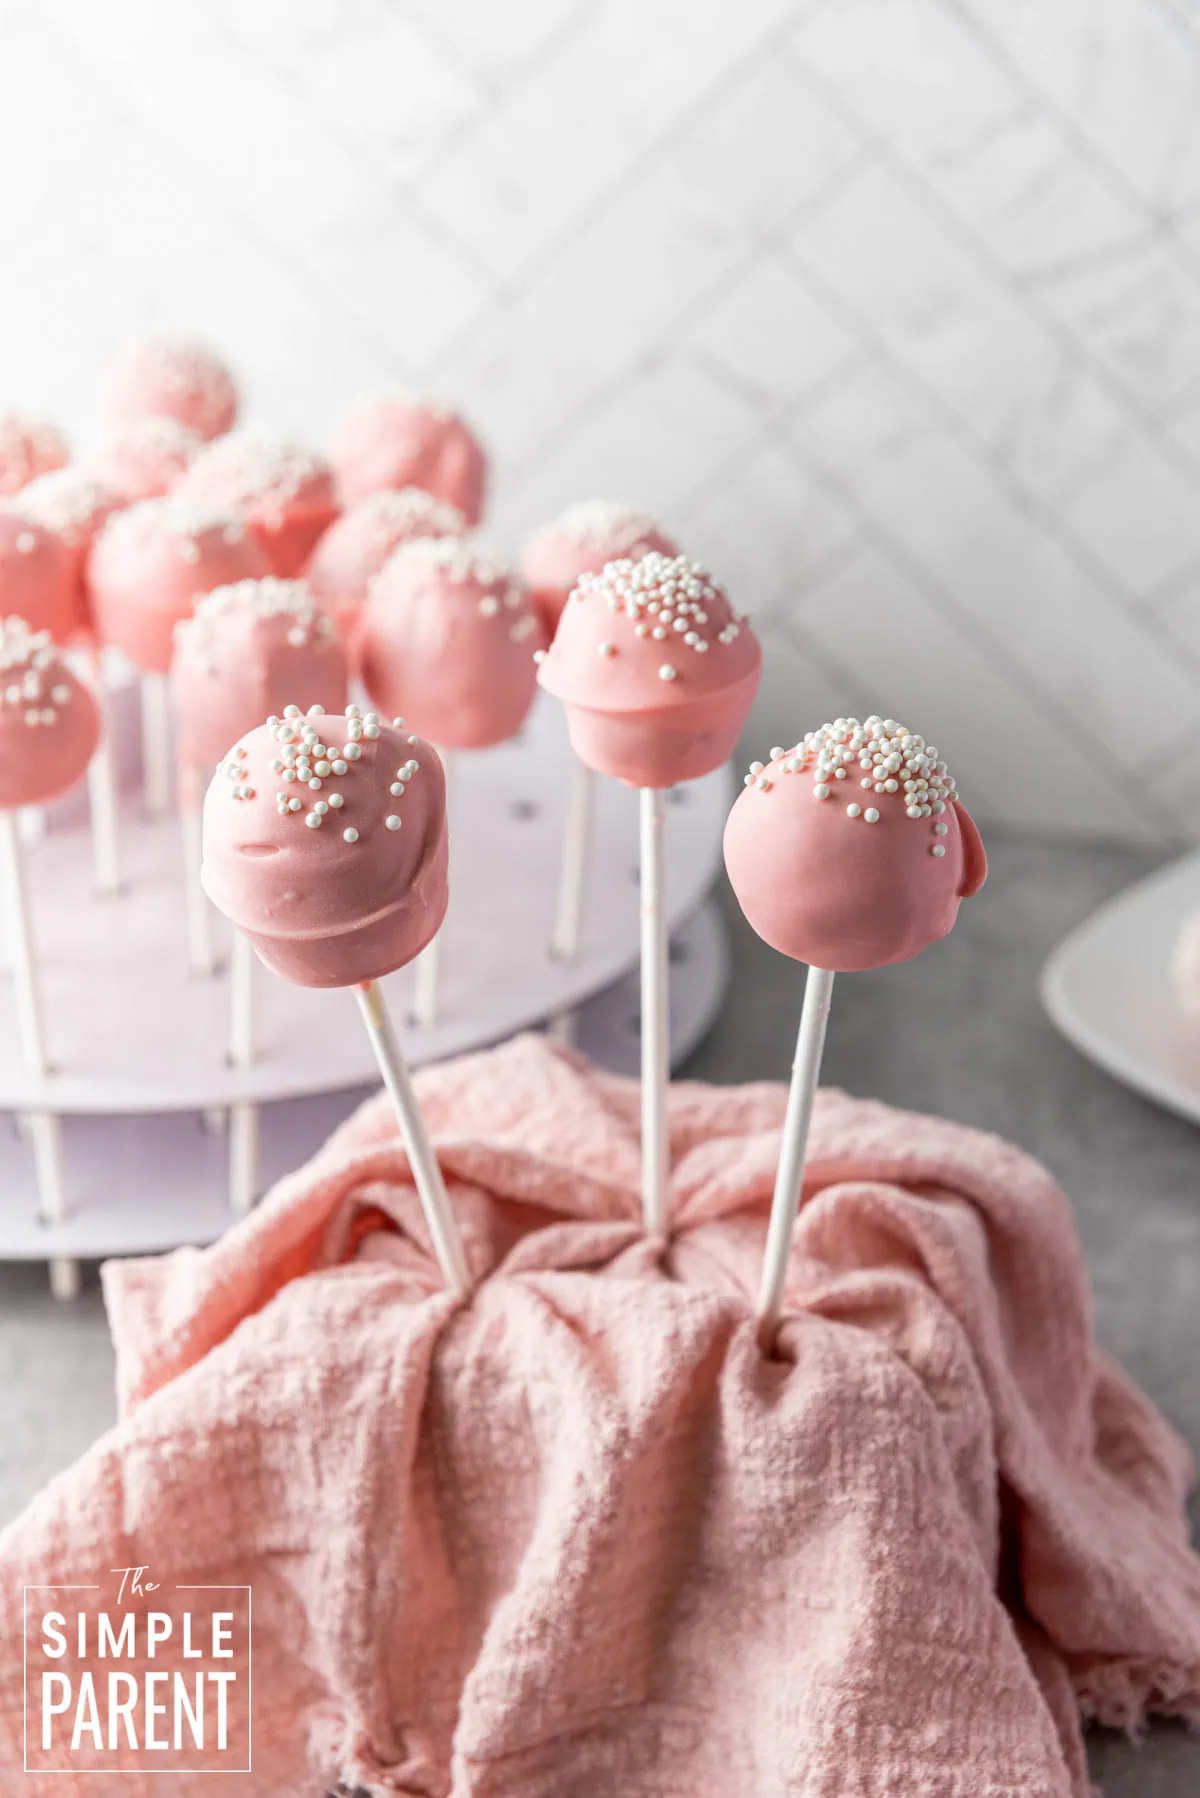
Valentine cake pops are the perfect copycat Starbucks cake pops you can make at home for way less money. These pink cake pops start with a simple box cake mix, get mixed with vanilla frosting, then get dipped in pink candy melts and topped with white sprinkles for the cutest valentines day cake pops.

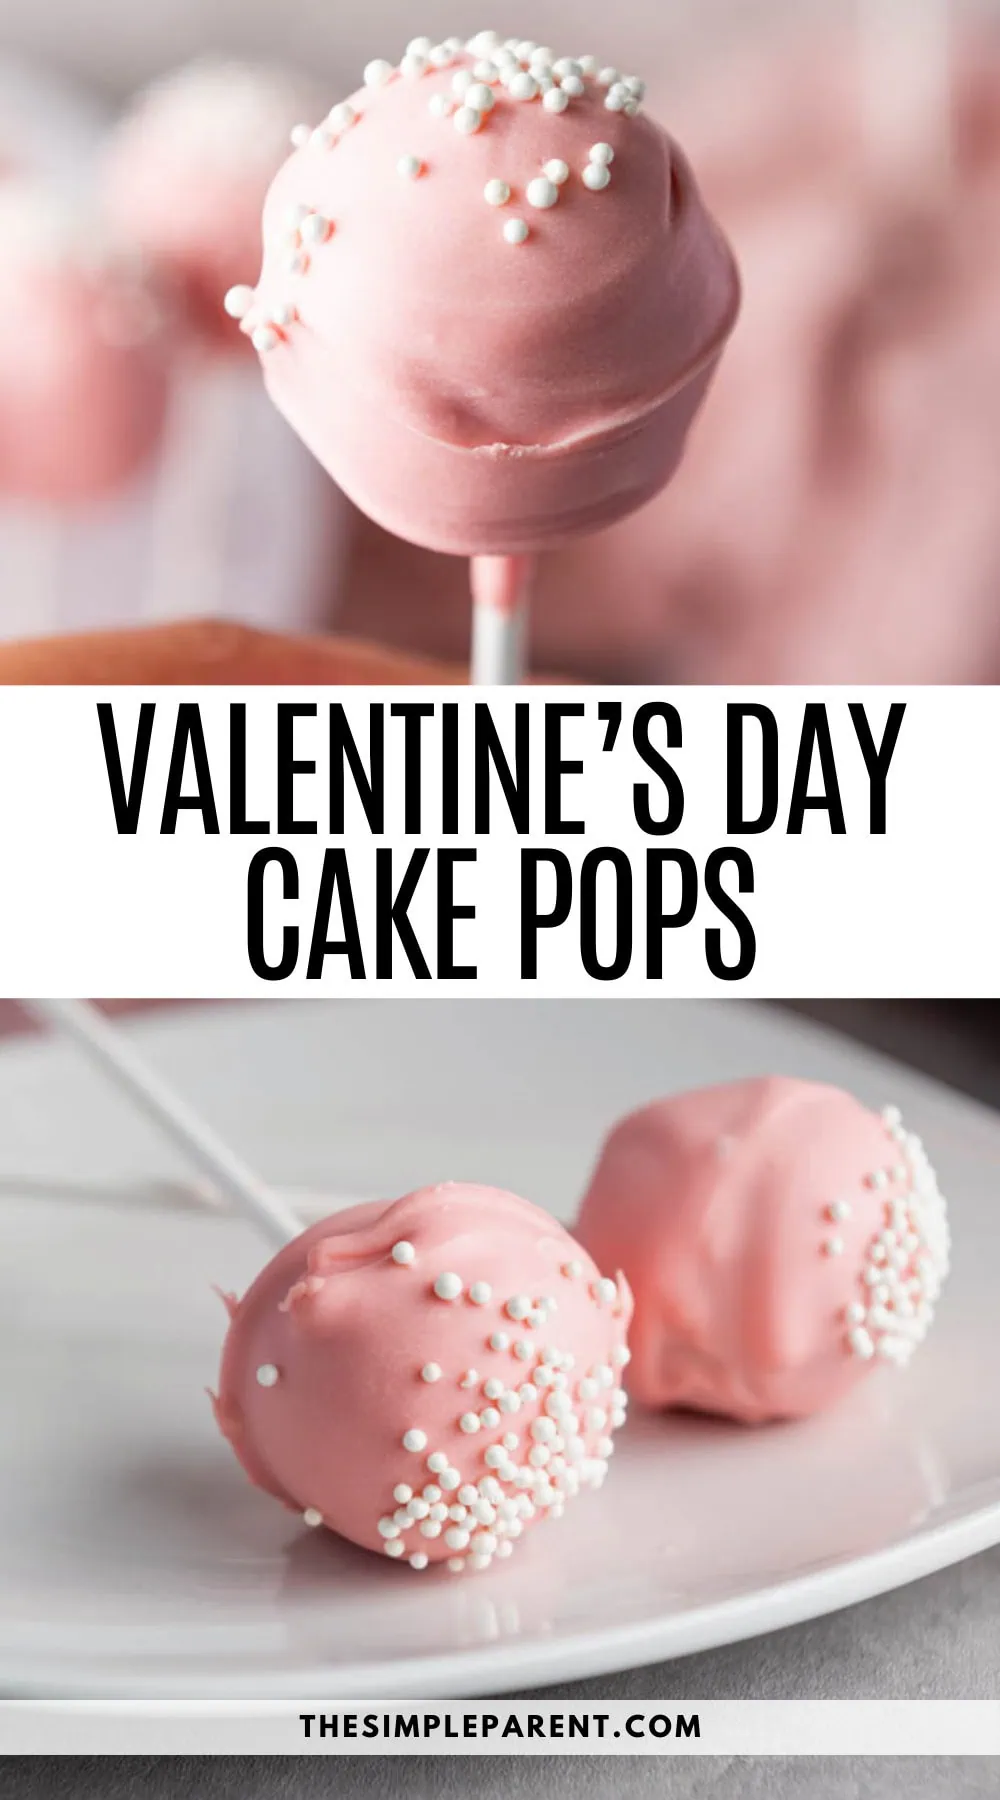
Valentine Cake Pops
What I love most about this recipe is how much better homemade cake pops taste than store-bought. You get moist cake inside with a smooth candy coating, and they’re perfect for Valentine’s Day parties, class treats, or packaging up as gifts. They take some time but the steps are really straightforward and honestly pretty fun to make.
Ingredients & Equipment
- Classic cake mix
- Eggs (as required by cake mix)
- Oil (as required by cake mix)
- Water (as required by cake mix)
- Vanilla frosting
- Pink candy melts
- White sprinkles
Full measurements for each ingredient can be found in the printable recipe card at the bottom of this post.
You’ll also need a few things from your kitchen:
- Large mixing bowl
- Baking pan (size per cake mix directions)
- Food processor or your hands for crumbling
- Baking sheet
- Parchment paper
- Cake pop sticks
- Microwave-safe bowl or double boiler
- Styrofoam block or cake pop stand
Step By Step Directions
This recipe makes 24 cake pops. It takes 30 minutes of prep time and 30 minutes of cook time, plus 45 minutes of cooling time.
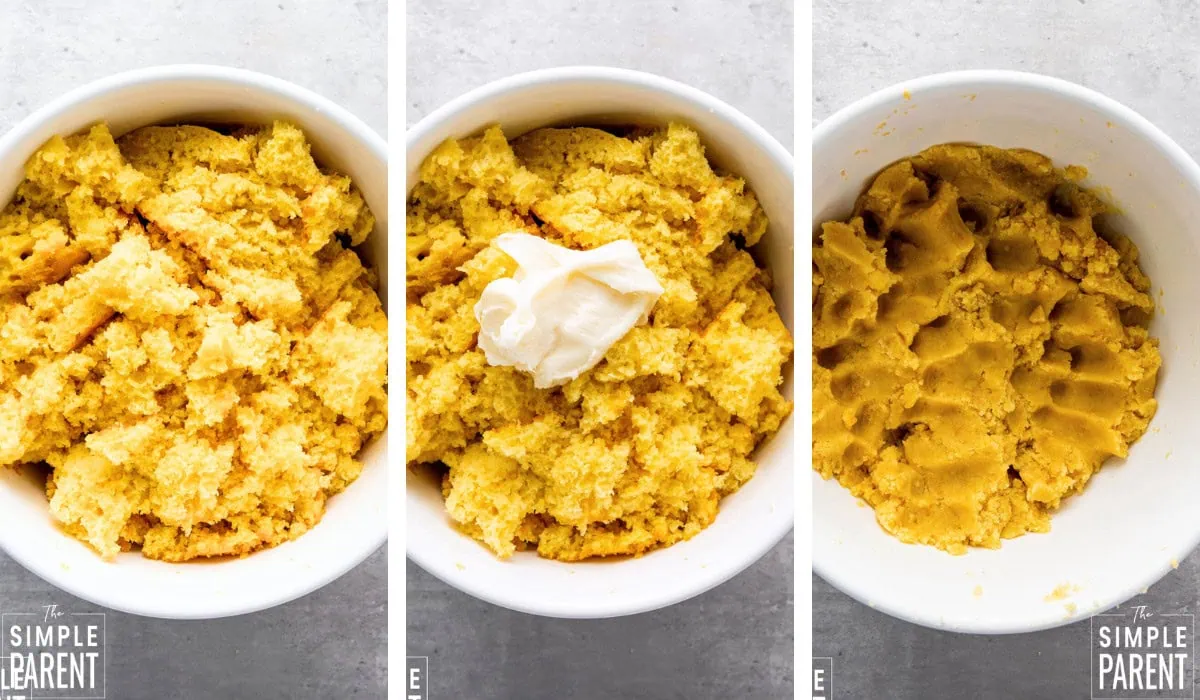
Step 1. Make the cake according to the directions on the box. Once baked, remove the cake from the oven and allow it to cool completely.
Step 2. Once the cake is completely cooled, crumble it into fine crumbs using your hands or a food processor. Add the vanilla frosting to the cake crumbs and mix until the mixture is well combined and holds together when pressed (like a dough).
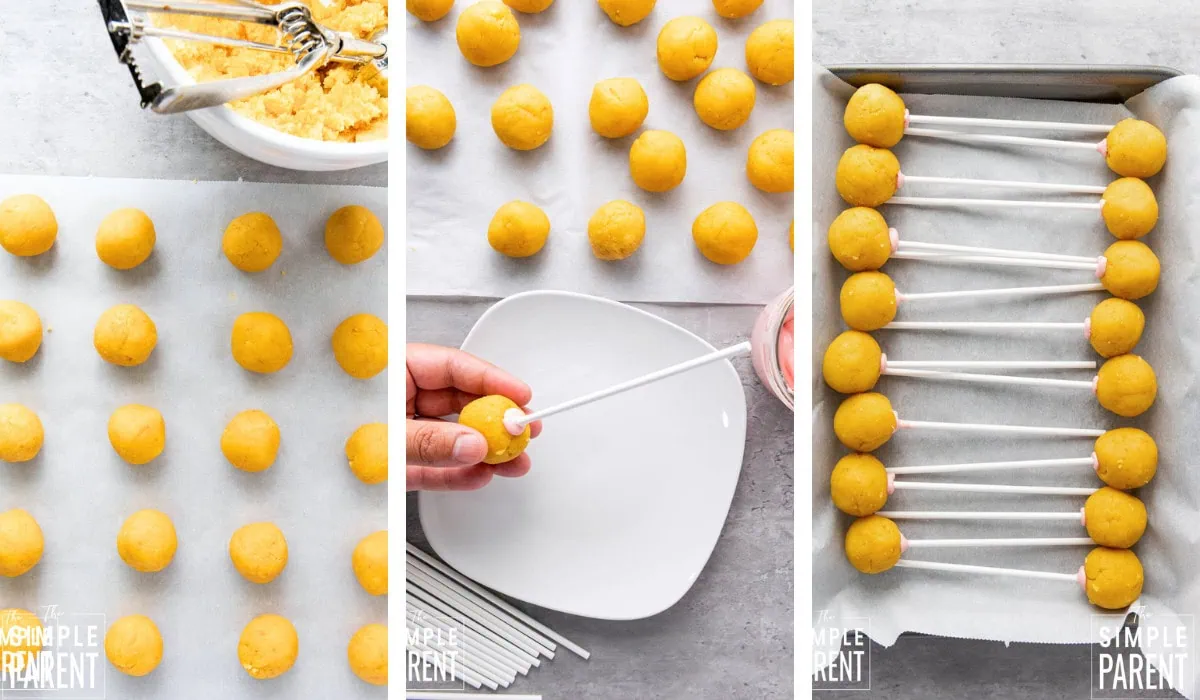
Step 3. Using your hands, scoop out small portions of the cake mixture and roll them into balls. Place them on a baking sheet lined with parchment paper.
Step 4. Freeze the cake balls for about 15 to 20 minutes, or until they are firm.
Step 5. Melt the pink candy melts in the microwave according to the directions on the package.
Step 6. Dip the tip of a cake pop stick into the melted candy, then insert it into a cake ball about halfway through. This helps secure the stick in the cake ball.
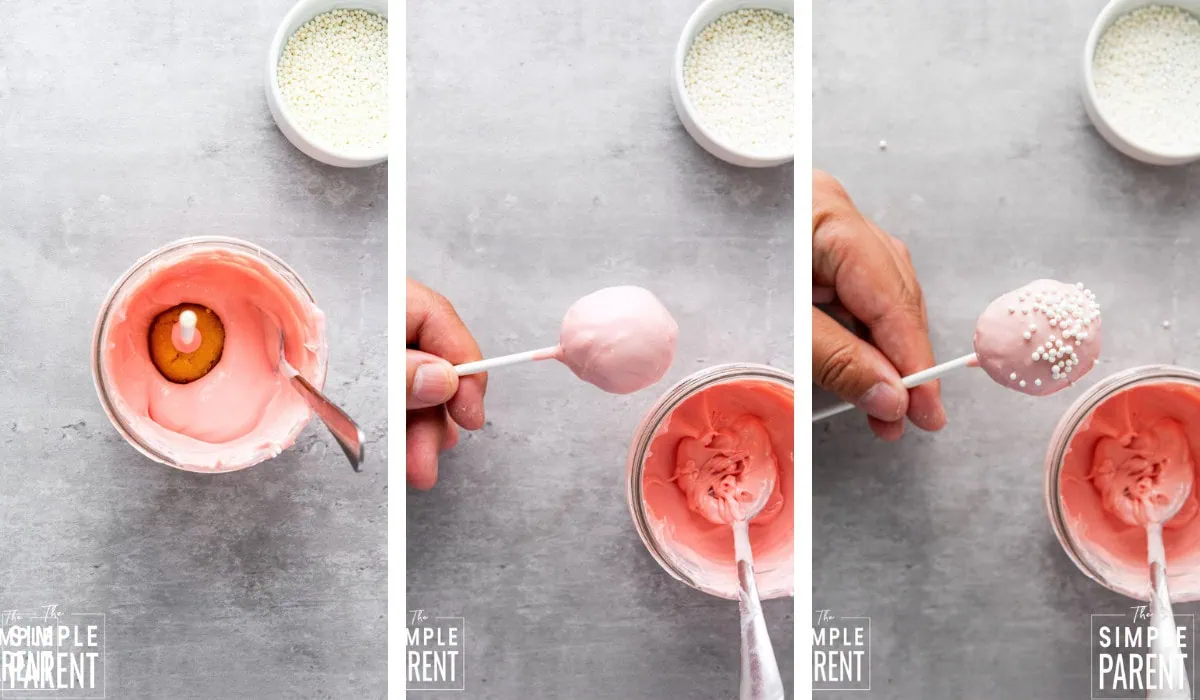
Step 7. Dip the entire cake ball into the melted candy, turning it to coat evenly. Allow any excess coating to drip off.
Variations
- Different Colors – Use red or white candy melts instead of pink, or do a mix of all three colors for variety
- Chocolate Cake Base – Use chocolate cake mix instead of vanilla for chocolate pink cake pops
- Different Sprinkles – Try heart sprinkles, red sugar crystals, or pink and red nonpareils
- Drizzle Design – Dip in white candy melts and drizzle with pink or red for a different look
- Add Flavor – Mix a little vanilla extract or almond extract into the cake and frosting mixture for extra flavor
- Make Them Fancy – Dip in candy melts, then roll in crushed cookies or finely chopped nuts before the coating sets
Leftovers & Storage
Store Valentine cake pops in an airtight container at room temperature for up to 3 days, or in the refrigerator for up to a week. You can also freeze them for up to 3 months. If you freeze them, let them thaw in the fridge overnight before serving. They taste best at room temperature, so take them out of the fridge about 30 minutes before eating.
Tips & Tricks
- Make sure the cake is completely cool before crumbling or the frosting will melt and make the mixture too wet.
- Start with less frosting and add more if needed – you want the mixture to hold together but not be sticky.
- Use a small cookie scoop to make uniform sized balls that look professional.
- Freeze the cake balls before dipping or they’ll fall apart in the melted candy.
- Tap the stick gently after dipping to remove excess candy and prevent drips.
- If the candy coating is too thick, add a teaspoon of vegetable oil to thin it out.
- Let the first bit of candy melt set before adding sprinkles if you want them to sit on top rather than sink in.
Recipe FAQs
Can I use homemade cake instead of a box mix?
Yes, any vanilla or white cake works perfectly for this recipe. You’ll need about 3 to 4 cups of crumbled cake. Homemade or box mix both turn out great.
What if my cake mixture won’t hold together?
Add more frosting, one tablespoon at a time, until the mixture holds its shape when you press it into a ball. The right texture should be like Play-Doh.
Do I have to freeze the cake balls before dipping?
Yes, freezing makes dipping so much easier because the balls stay firm and don’t fall apart in the warm candy melts. It’s a step you really don’t want to skip.
How do I prevent the cake pops from falling off the sticks?
Make sure you dip the stick in candy melts before inserting it into the ball, and only push it about halfway through. Let that set for a few minutes before dipping the whole pop.
Can I make these ahead of time?
Absolutely! These valentine cake pops taste even better after sitting for a day because the flavors blend together. Make them up to 3 days ahead and store at room temperature, or freeze them for longer storage.
What’s the best way to display cake pops without a stand?
Poke the sticks into a styrofoam block covered with tissue paper, use an upside-down colander, or stick them into a vase filled with rice or sugar to hold them upright while they set.
More Valentine’s Day Treats
- Red Velvet Cake Balls
- Strawberry Fudge
- Strawberry Shortcake Puppy Chow
- Valentine Oreos
- Valentine Marshmallow Pops
- Heart Shaped Nutella Fudge
- Valentine Pretzels
- Valentine Peanut Butter Blossom Cookies
- Valentine’s Day Candy Bark
- Valentine Peanut Butter Balls
- Valentine Chocolate Cake Mix Cookies
- Easy Heart Shaped Cupcakes
Equipment
- Food processor or your hands for crumbling
- Cake Pop Stand or Styrofoam block
Ingredients
Instructions
- Prepare the cake according to the directions on the box. Once baked, remove the cake from the oven and allow it to cool completely.
- Once the cake is completely cooled, crumble it into fine crumbs using your hands or a food processor. Add the vanilla frosting to the cake crumbs and mix until the mixture is well combined and holds together when pressed (like a dough).
- Using your hands, scoop out small portions of the cake mixture and roll them into balls. Place them on a baking sheet lined with parchment paper.
- Freeze the cake balls for about 15 to 20 minutes, or until they are firm.
- Melt the pink candy melts in the microwave according to the directions on the package.
- Dip the tip of a cake pop stick into the melted candy, then insert it into a cake ball about halfway through. This helps secure the stick in the cake ball.
- Dip the entire cake ball into the melted candy, turning it to coat evenly. Allow any excess coating to drip off.
- While the coating is still wet, sprinkle the white sprinkles over the top for decoration.
- Place the cake pop upright in a cake pop stand to set.
- Repeat with the remaining cake balls. Allow the cake pops to set completely at room temperature or in the fridge.
- Once cooled and set, enjoy!
Notes
Pin This Post
Leave a Reply